Client Profiling

Main Menu: Master File Maintenance (1) - Client Files (3) - Client Information (1)
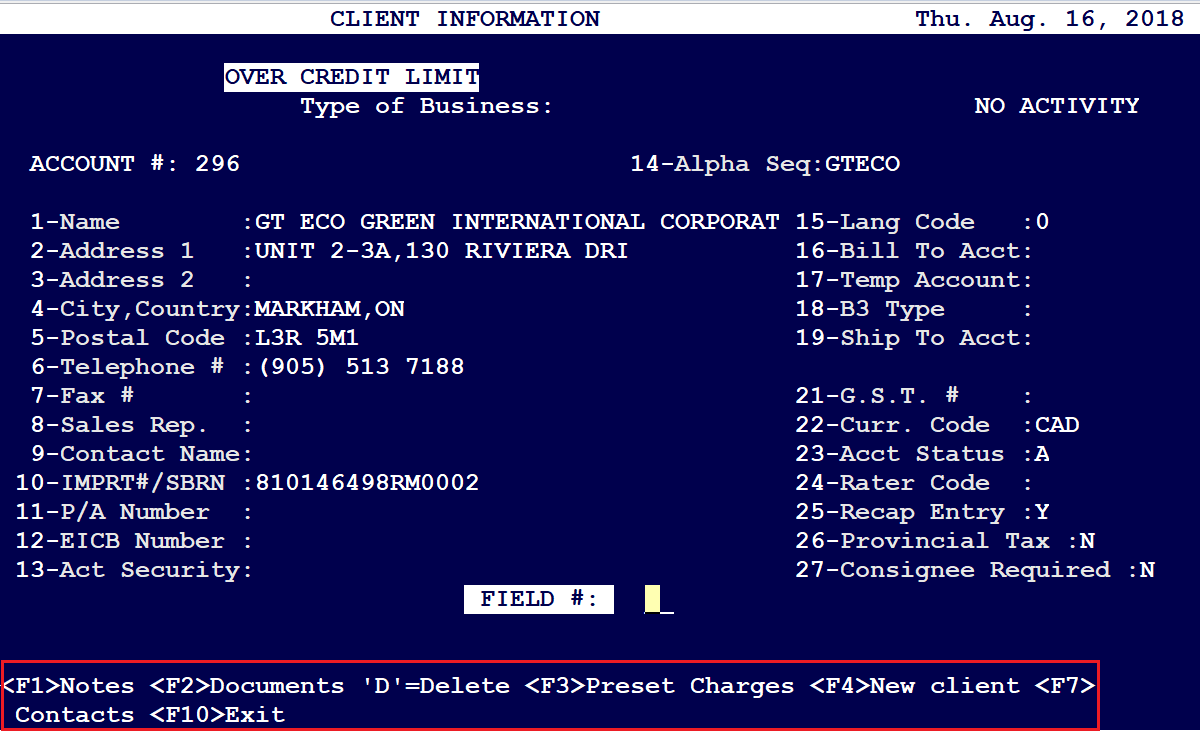
Fields explained:
Once you hit “Enter” after filling in the data on the above screen, it takes you to the Client Billing Information Screen as per below:
CLIENT BILLING INFORMATION SCREEN
There are several function keys at the bottom of the screen when you first get into this screen Below is what comes up.
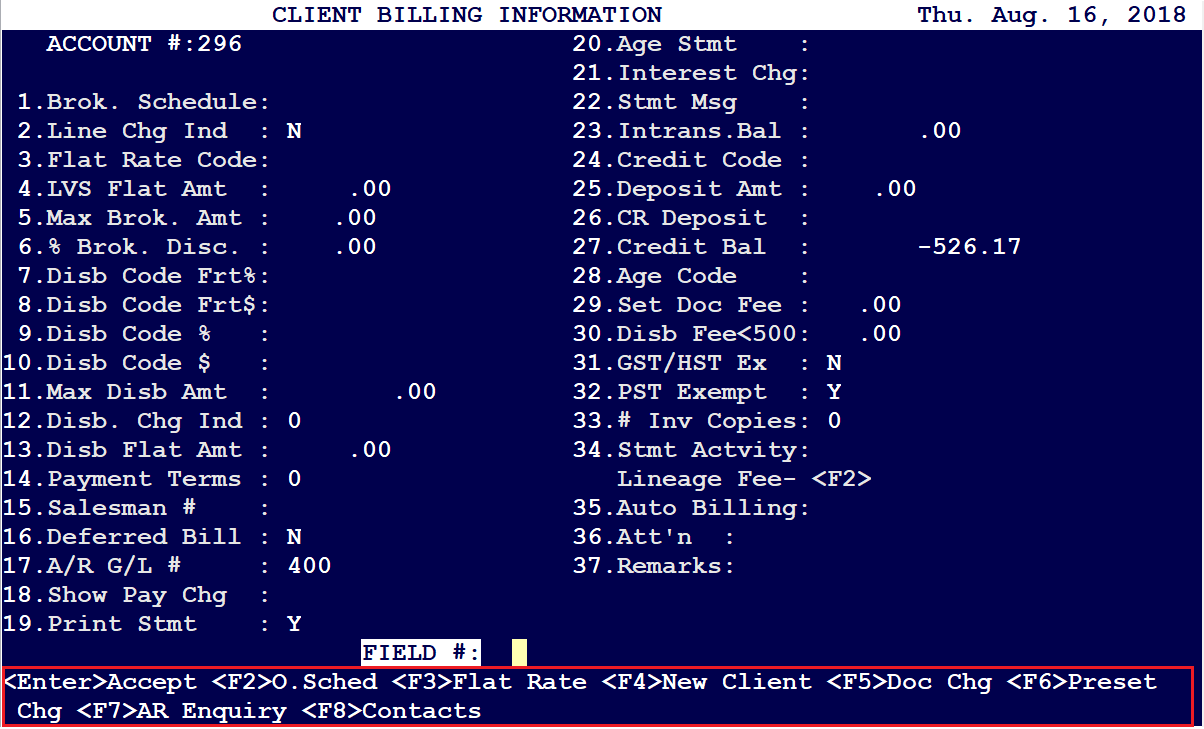
Fields Explained:
|
1.Brok. Schedule: Enter Brokerage schedule code from the Brokerage schedule code table. The brokerage schedule code table is set up separately from this screen and must be set up prior to entering a code here.
|
|
2.Line Chg Ind : This is where you specify how many lines of a B3 entry are included in the regular brokerage rate before additional line charges apply. You enter a number here for the number of lines included in the regular brokerage rate or “N” if no additional line charges apply. With the “N” option, there will never be additional B3 line charges no matter how large the B3 entry.
|
|
3.Flat Rate Code: Enter the flat rate code here. This is set up in another table and must be set up before entering the code here. If you are not using flat rates, then a “N” is entered. |
|
4.LVS Flat Amt : Enter the flat rate code for LVS here. This is set up in another table and must be set up before entering the code here. If a “0” is entered in this field, then flat rates for LVS do not apply. |
|
5.Max Brok. Amt : This is the maximum amount you would charge for brokerage. This could be used if you are charging for additional B3 lines but want to put a cap on the total brokerage you charge the client. |
|
6.% Brok. Disc. : This is a percentage discount off of the brokerage fee. For example, it would show the client standard brokerage charge and the client receiving a percentage discount. Probably would not use. #7 through #13 deal with disbursements: |
|
7.Disb Code Frt%: Enter the disbursement % code for freight. Here, you are charging a percentage of the amount disbursed. This is done from a separate disbursement schedule table that must be set up before entering a charge here. |
|
8.Disb Code Frt$: Enter the disbursement amount dollar amount code for freight. Here, you are charging a flat amount for the disbursement regardless of the amount of money disbursed. This is done from a separate disbursement schedule table that must be set up before entering a charge here. |
|
9.Disb Code % : Enter the disbursement % code for disbursements besides freight. Here, you are charging a percentage of the amount disbursed. This is done from a separate disbursement schedule table that must be set up before entering a charge here. |
|
10.Disb Code $ : Enter the disbursement dollar amount code for disbursements besides freight. Here, you are charging a flat amount for the disbursement regardless of the amount of money disbursed. This is done from a separate disbursement schedule table that must be set up before entering a charge here. |
|
11.Max Disb Amt : This is the maximum amount of money you would disburse on the behalf of a client. |
|
12.Disb. Chg Ind : This gives you the option to charge disbursements based on duties and taxes, based on freight amount, or based on duties and taxes and freight. Most brokers are not using this option. |
|
13.Disb Flat Amt : This allows you to set up a flat dollar amount for each disbursement made. The set dollar amount applies regardless how large the dollar disbursement. |
|
14.Payment Terms : Enter the terms of payment code. This is done in another table which must be set up before entering the code here. |
|
15.Salesman # : This is where you set up sales person commission schedules. A table listing sales people must be set up before setting up the sales person commission schedule. When you go to this field, the following screen comes up. |
|
16.Deferred Bill : This is how billing is sent to the client. A “Y” in this field is used for summary or statement billing. If an “N” is used in this field, one individual bill is sent to the client per shipment or entry. Basically, a “Y” in this field defers the billing to a future time instead of doing the billing immediately. |
|
17.A/R G/L # : This is the G/L number for Accounts Receivable. The system will carry over what is set up in field 22 Curr. Code field on the initial Client Information Screen. Choosing this number is done after you enter the currency on initial Client Information Screen in field 22. The G/L numbers are set up in the General Ledger Control Maintenance table. |
|
18.Show Pay Chg : “Y” – shows disbursement and brokerage charges separately “N” – shows disbursement and brokerage charges together (combines them into one amount) |
|
19.Print Stmt : Used to automate printing of the Accounts Receivable Aging Statement. If you use this option, then aging statements would be set up to print in specified time periods. This would happen if you use the “Y” option. If you use the “N” option, then Aging Statements would not be automatically printed. Most brokers use the “N” option here. |
|
20.Age Stmt : This is used to “age” statements. Y is used for aging and N is used if you do not want statements aged. Most brokers would use “Y” here. |
|
21.Interest Chg: Here you enter the interest charge code from another table. The interest charge code table must be set up before entering a code here. |
|
22.Stmt Msg : This is wording that would go on every invoice you sent to the client, such as “Thank you for your business.” |
|
23.Intrans.Bal : This is the average balance outstanding the customer would have over a one year period. |
|
24.Credit Code : Here you enter the credit limit code. The credit limit codes are built in another table. The credit limit code table must be set up before entering a code here. |
|
25.Deposit Amt : This is used when a client gives money to the broker in advance. It is not a good idea to use this option and most brokers would not use. |
|
26.CR Deposit : This is what you took away from the Deposit Amount in #25 above (i.e. to pay a charge related to the client. It is not a good idea to use this option and most brokers would not use. |
|
27.Credit Bal : This is the amount of credit the client has left right now before they exceed their credit limit. (Or what the client has outstanding right now?) |
|
28.Age Code : Here you enter the aging code. This is set up in an aging code table. The aging code table must be set up before entering a code here. |
|
29.Set Doc Fee : This is a fee you would set up for handling certain types of documents, such as special permits or having to handle documents manually. You cannot specify the type of doc fee here. Most brokers would not use this. Instead of using this field, you would likely use the F5 Doc Chg option at the bottom of the screen. |
|
30.Disb Fee<500: This allows you to set up a disbursement fee amount for disbursements under $500. Most brokers would not use and instead would use #7-13 above. |
|
31.GST/HST Ex : You cannot charge GST/HST on your services to non-resident importers that are not registered with an RT account. For companies with an RT account, you are required to bill GST/HST. In this field, you only put a “Y” for a non-resident importer that does not have an RT account on file. Otherwise, you would put a “N” in this field and would charge the client GST/HST on your services. |
|
32.PST Exempt : The PST normally only applies to casual goods importations. For commercial goods importations, you would be exempt from the PST. For importers who are importing commercial goods, put a “Y” in this field. For importers who are importing casual goods, put a “N” in this field. These are normally the circumstances regarding this field. |
|
33.# Inv Copies: Number of copies here defaults to “0”. This means that only one copy of the invoice gets printed or sent to the customer. Normally, you would use a “0” here. |
|
34.Stmt Actvity: Lineage Fee- Enter Y if you want the statement to print all activity. Enter N if you want the statement to print only open items. |
|
35.Auto Billing: There are 3 options here: Never Release – ACROSS Release B3 – B3 Acceptance With the Release – ACROSS Release option, the system automatically bills the customer as soon as the shipment is released in ACROSS. With the B3 – B3 Acceptance option, the system automatically bills the customer as soon as the B3 is accepted on the shipment. The risk of using this option is that the system bills the customer before the entry is audited and there is a higher risk the customer could be billed an incorrect amount for duty and taxes. Most of the time, probably would want to use the “Never” option. |
|
36.Att'n : This is a text field to put in the person who you want invoices to go to. |
|
37.Remarks: This is a text field to enter remarks that you want to put on every invoice that goes out to the client. |
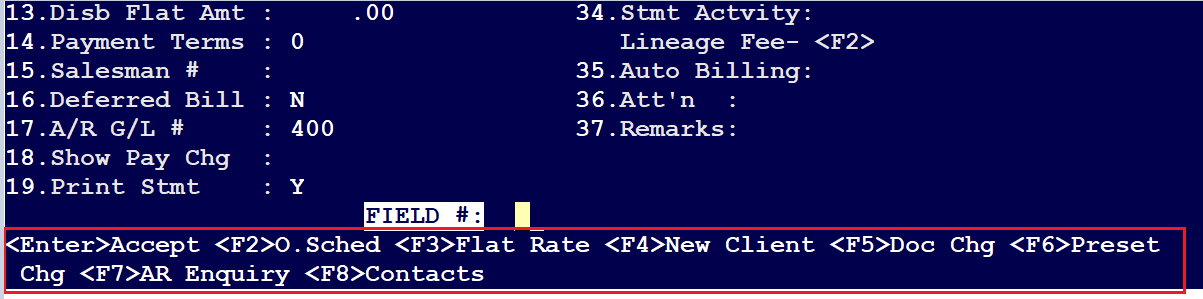
There are several function keys at the bottom of the screen when you first get into this screen Below is what comes up:
|
<Enter> Accept This will save your client billing information. |
|
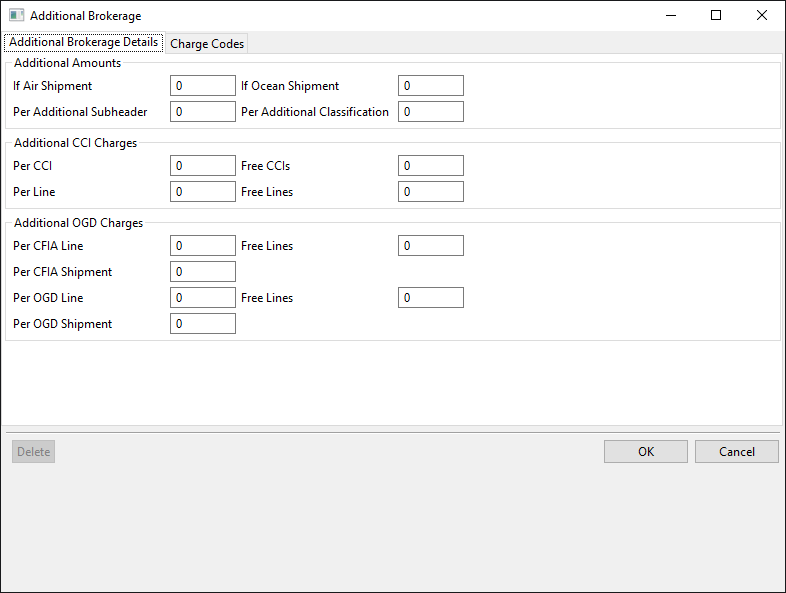
<F2> O.Sched This brings up “Additional Brokerage Details” such as additional charges for an OGD entry or additional charges after a certain number of B3 entry lines. You also enter charge codes on this screen. It looks like this below. |
<F3> Flat Rate
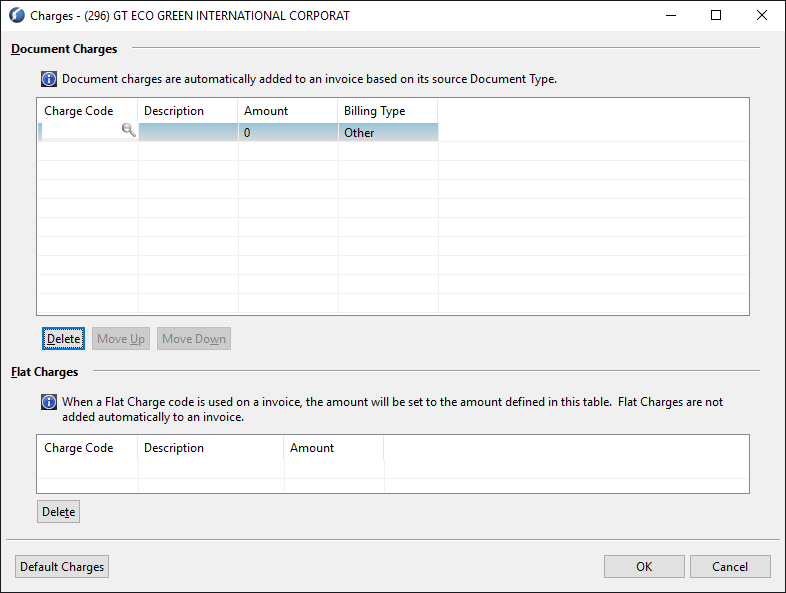
This is used for “Document Charges” and “Flat Charges”. Document Charges are automatically added to the invoice based on its source Document Type. When a Flat Charge code is used on an invoice, the amount will be set to the amount defined in the table you set up. Flat Charges are not automatically added to an invoice. The screen is below.
<F4> New Client
Lets you get to the Client Information screen for another client besides the one in the screen you are on.
<F5> Doc Chg
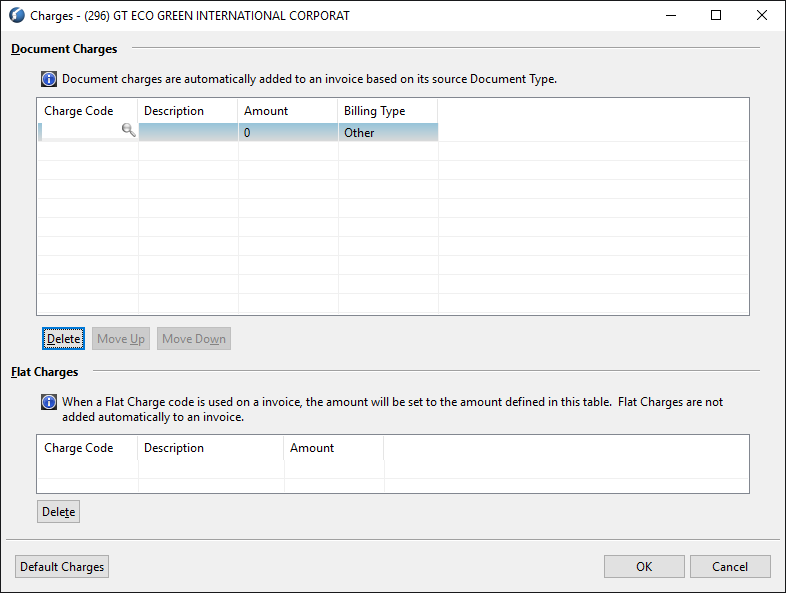
Brings up the same table as when you hit F3 for Flat Rate. This is what comes up below
<F6> Preset Charges
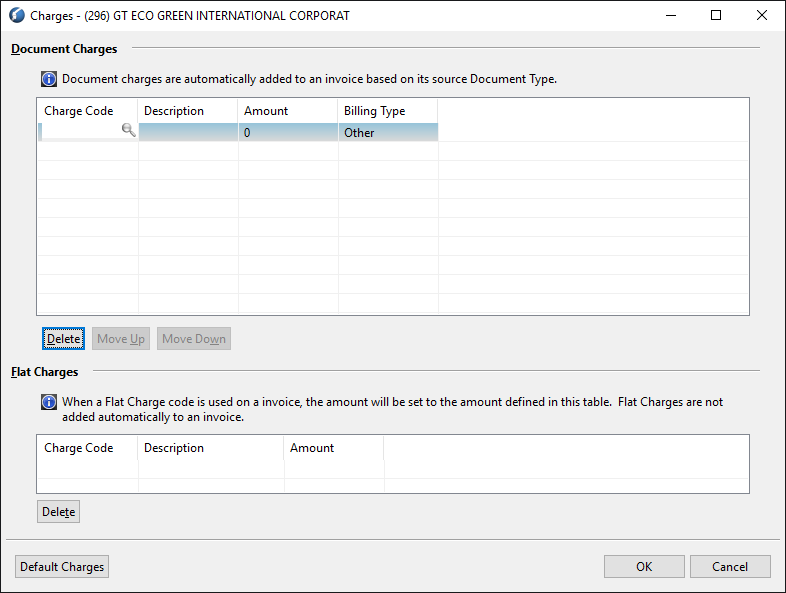
Brings up the same table as when you hit F3 for Flat Rate. This is what comes up below
<F7> AR Enquiry
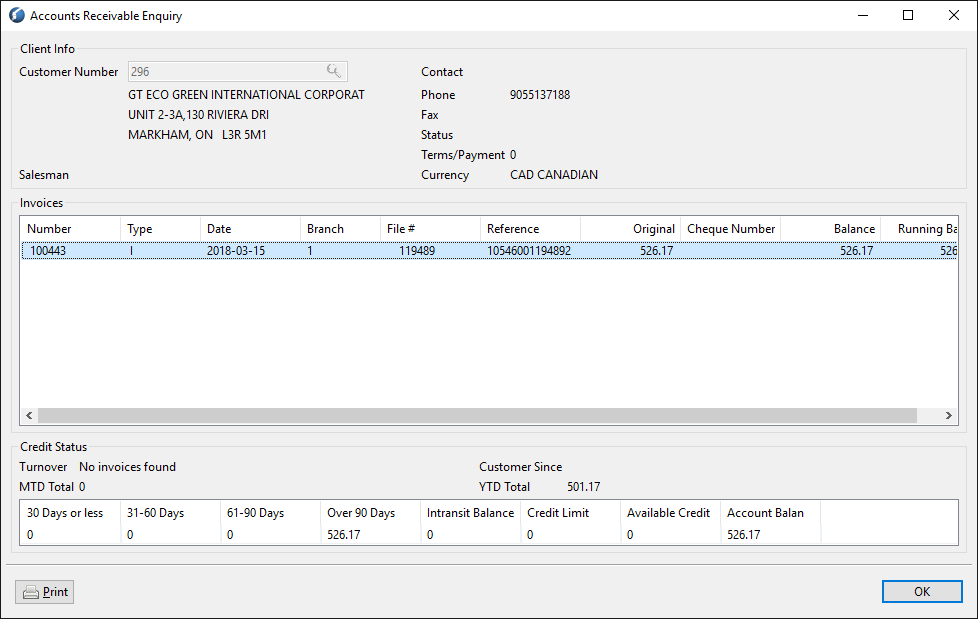
This is an Accounts Receivable Inquiry that shows you open invoices and aging reports. It can also be printed if you want to send it out to the client. It looks like the screen below
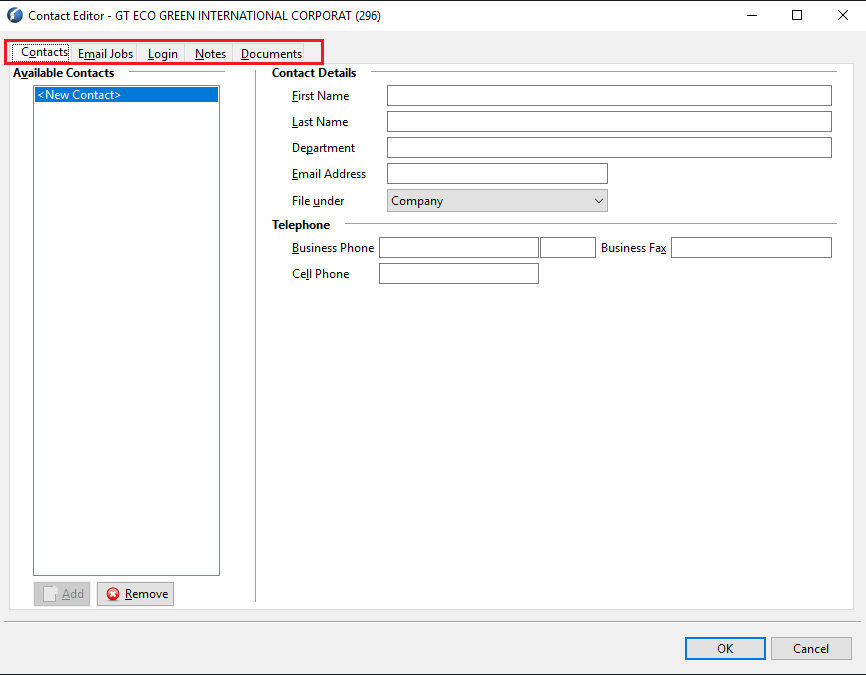
<F8> Contacts
This brings up the Client's contacts. From here you can also setup the system to email certain documents. Notes for client can also be entered here. You can also attach documents related to a client here. The screen for this is below:
Comments
0 comments
Article is closed for comments.