Boats and Trailers

Step 1:
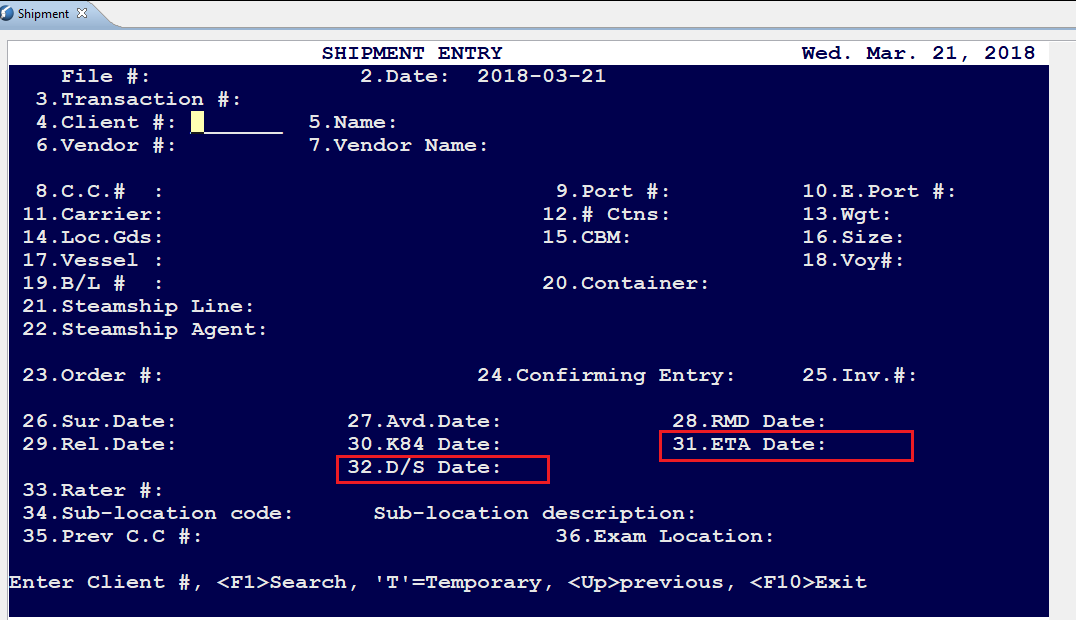
Go into the Shipment Entry screen (13-1) and start keying in your shipment data as usual. Ensure that the ETA Date/Field # 31 is completed as now mandatory.
Step 2:
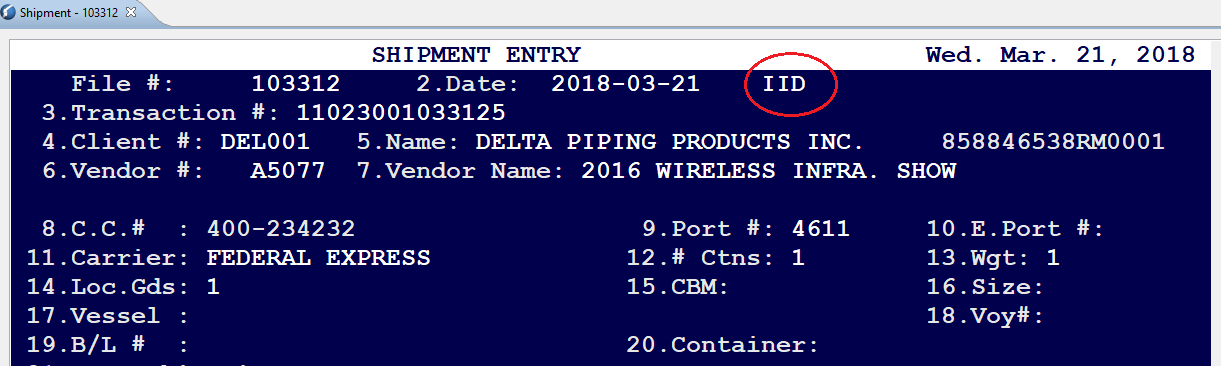
After the transaction # is generated with the File #; “File Number XXXX has been created, with the Transaction Number XXXXXXXXXX”, Press the “F9” key to ENABLE IID and you should see “IID” on the top of the Shipment entry screen. See screenshot below:
Step 3:
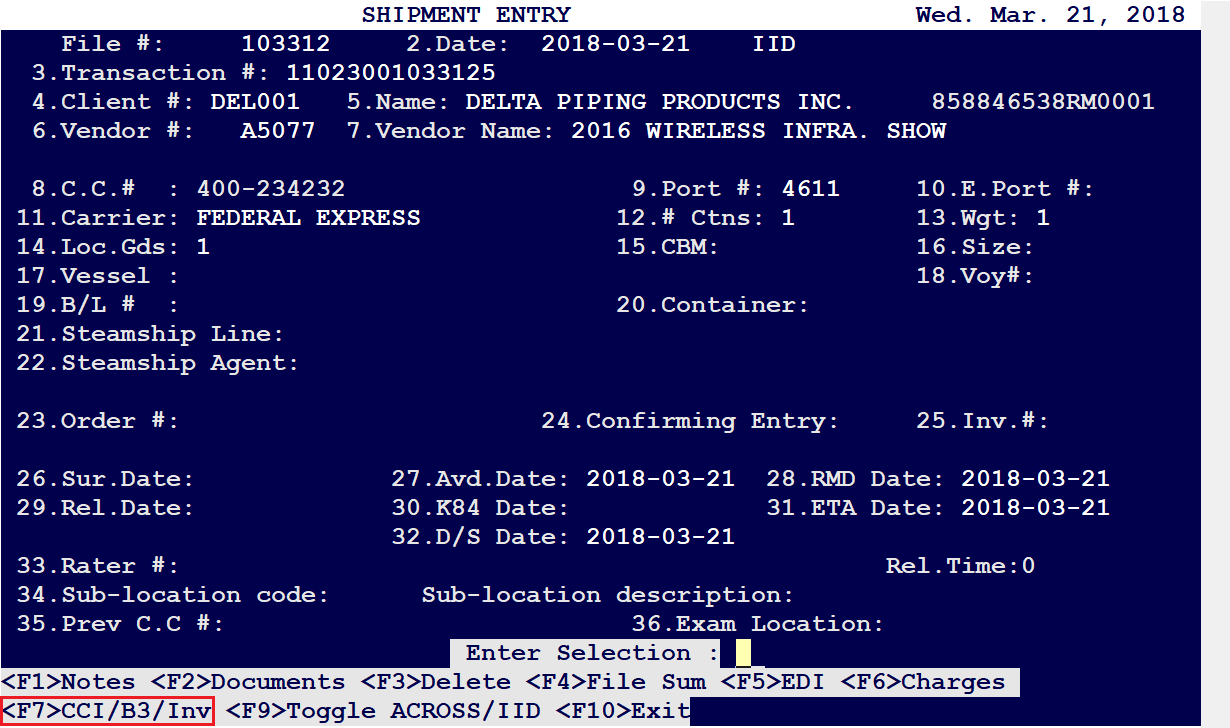
Once “IID” appears on the top, press on “F7” to select CCI and then ENTER as usual.
Step 4:
Field # 8, Press on <F5> to edit the client. Ensure the correct City, Province, Country and “Contact” with Email Address” are entered properly.
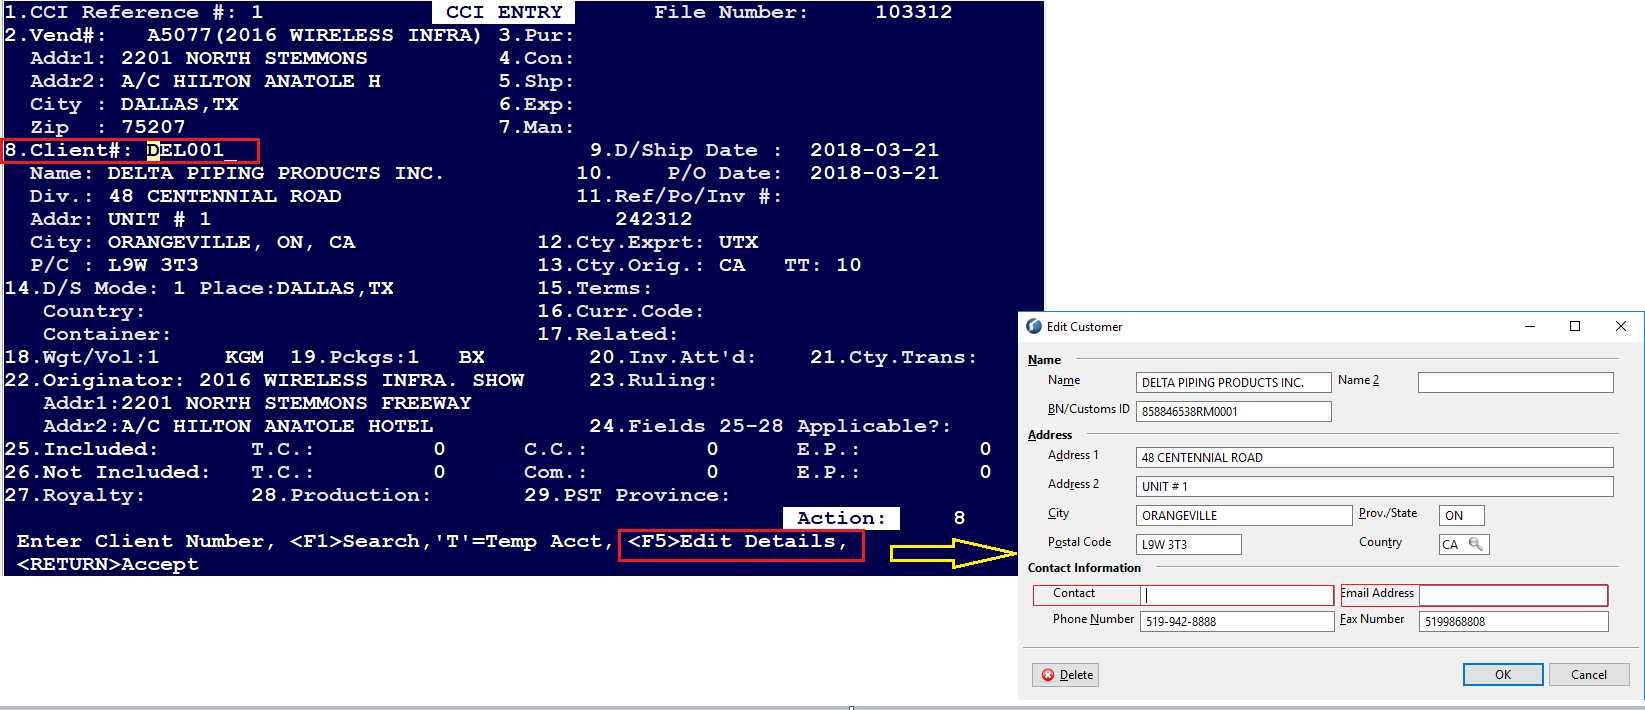
Step 5:
Continue to key in the CCI Details, and ensure that the UOM is selected for Field # 18 and Field # 19 (Field 19 is currently BX Boxes)
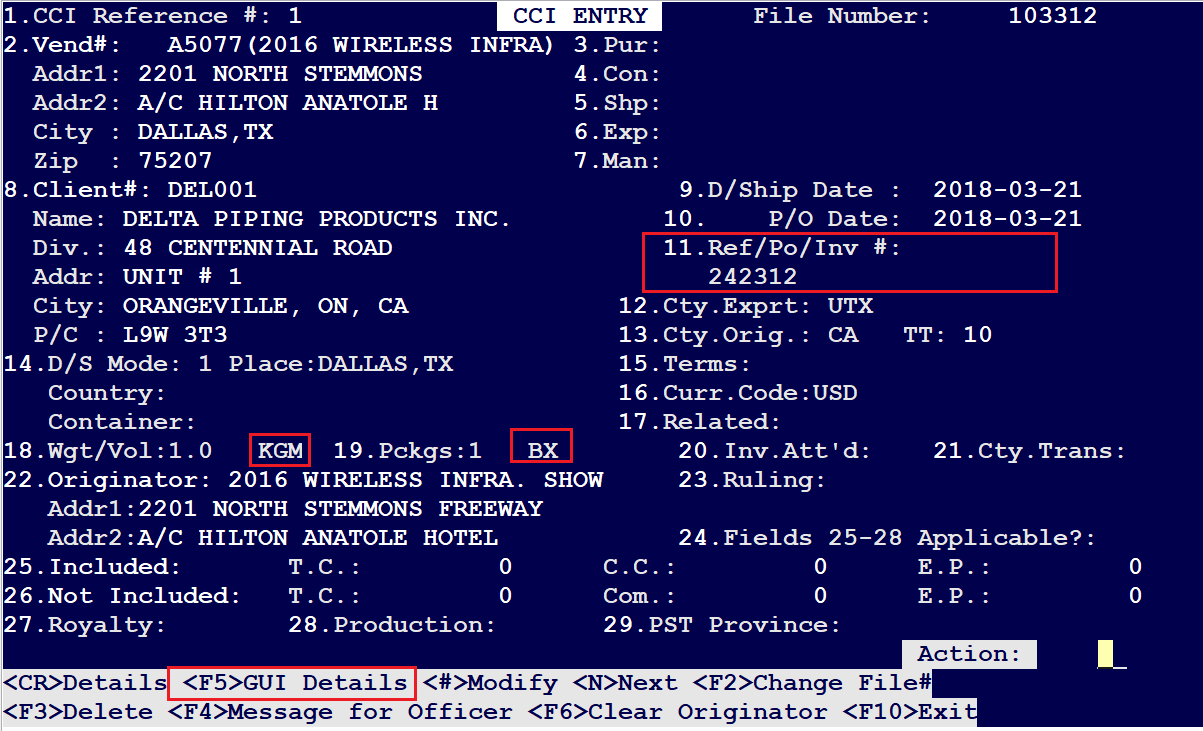
Step 6:
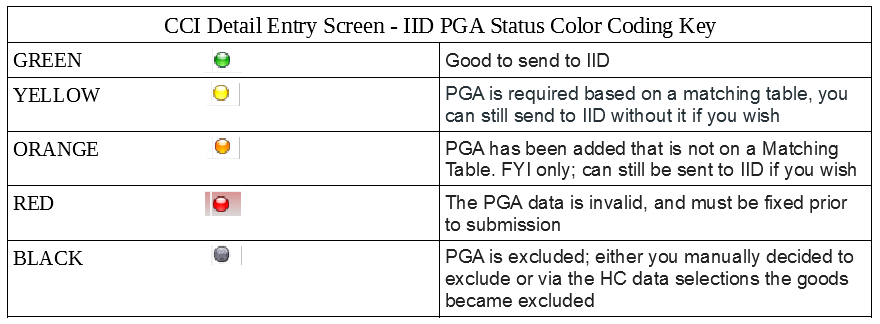
<F5> GUI Details to enter Invoice data. Enter Total Shipment Value. Also please refer to the IID PGA Viewing Modes and Status below:
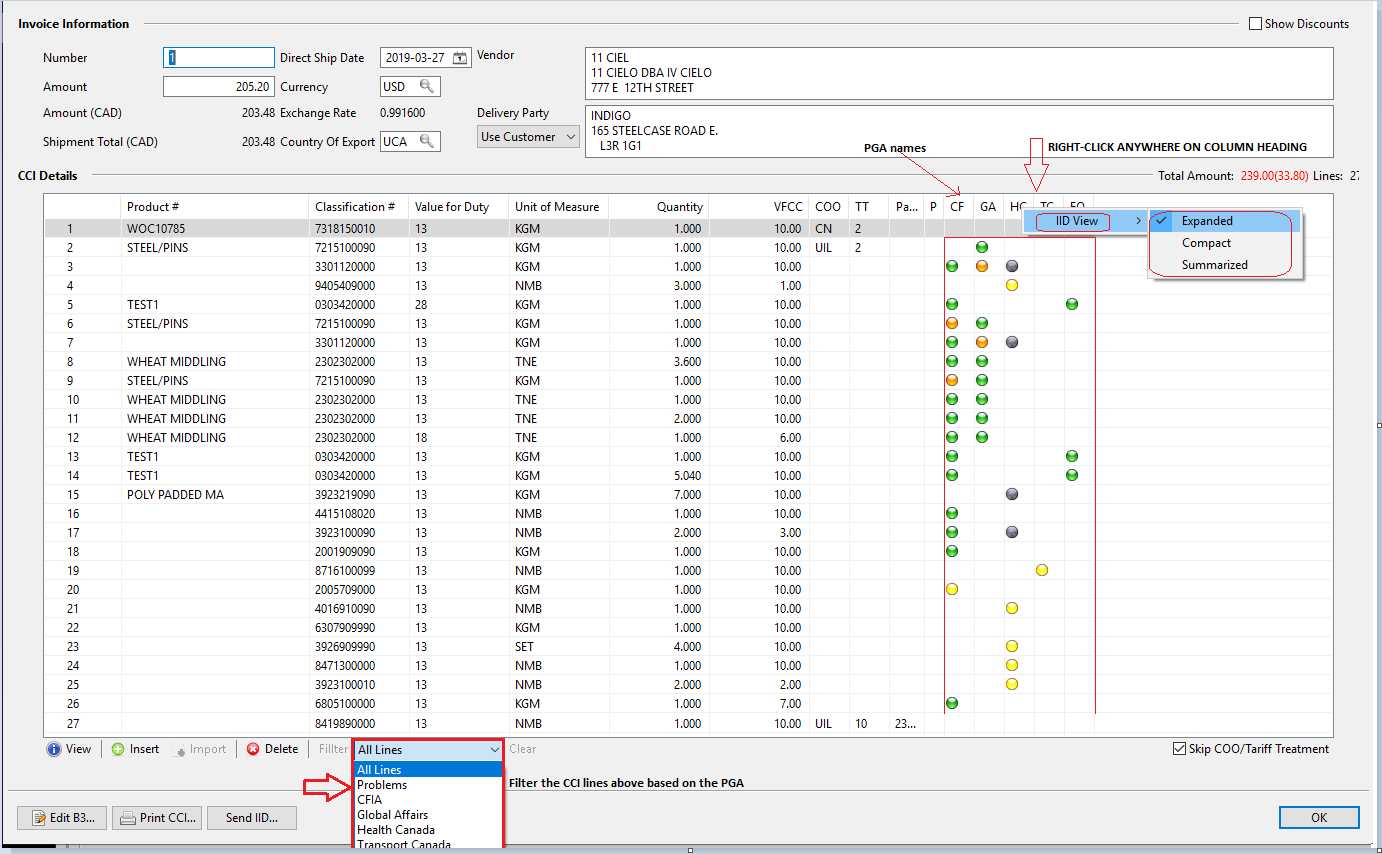
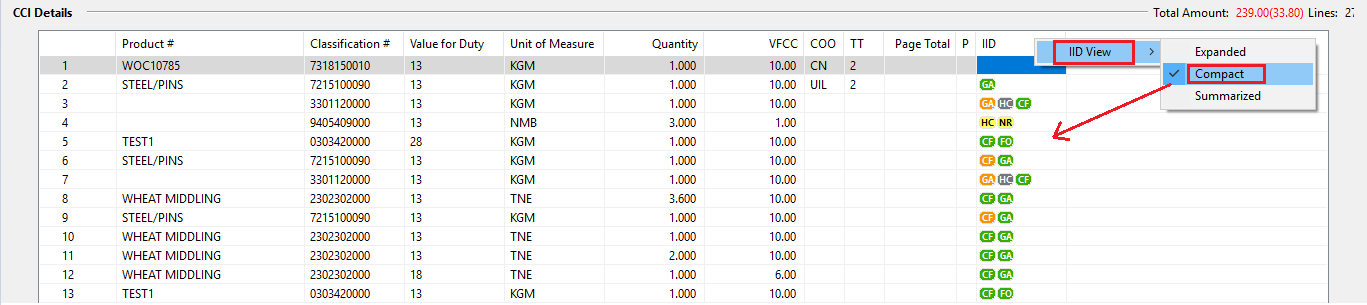
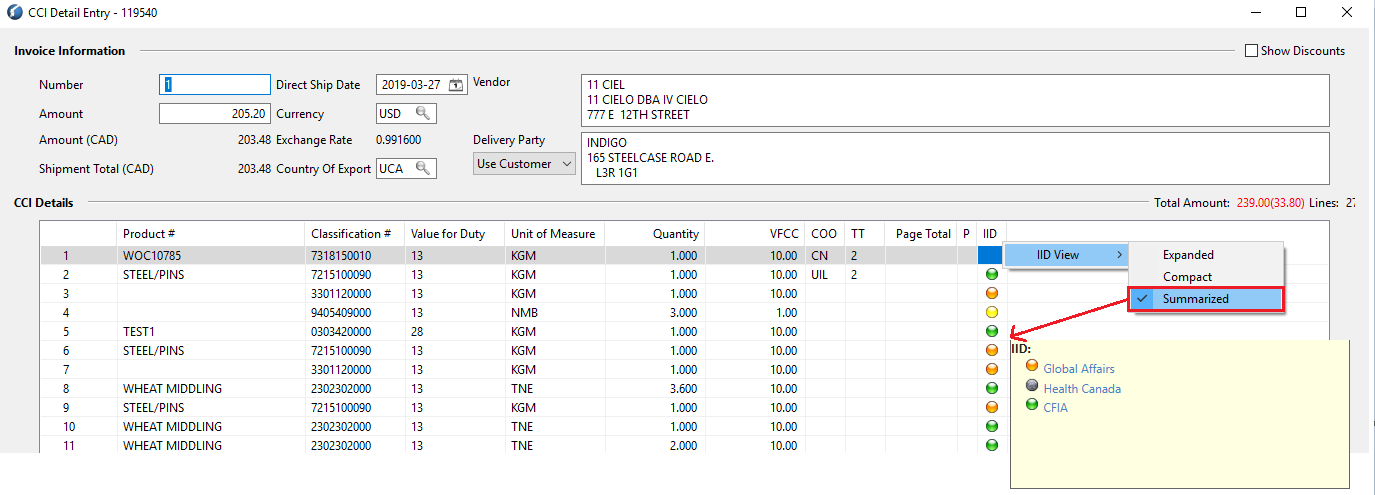
- Please note you can also use the "Import" option in the above window to import CCIs from a spreadsheet, instead of a manual line by line entry. How to use the 'Import' option - the guide is over here: Import CCI option
- Also the "Unit of Measure" value above can be changed as required
Step 7:
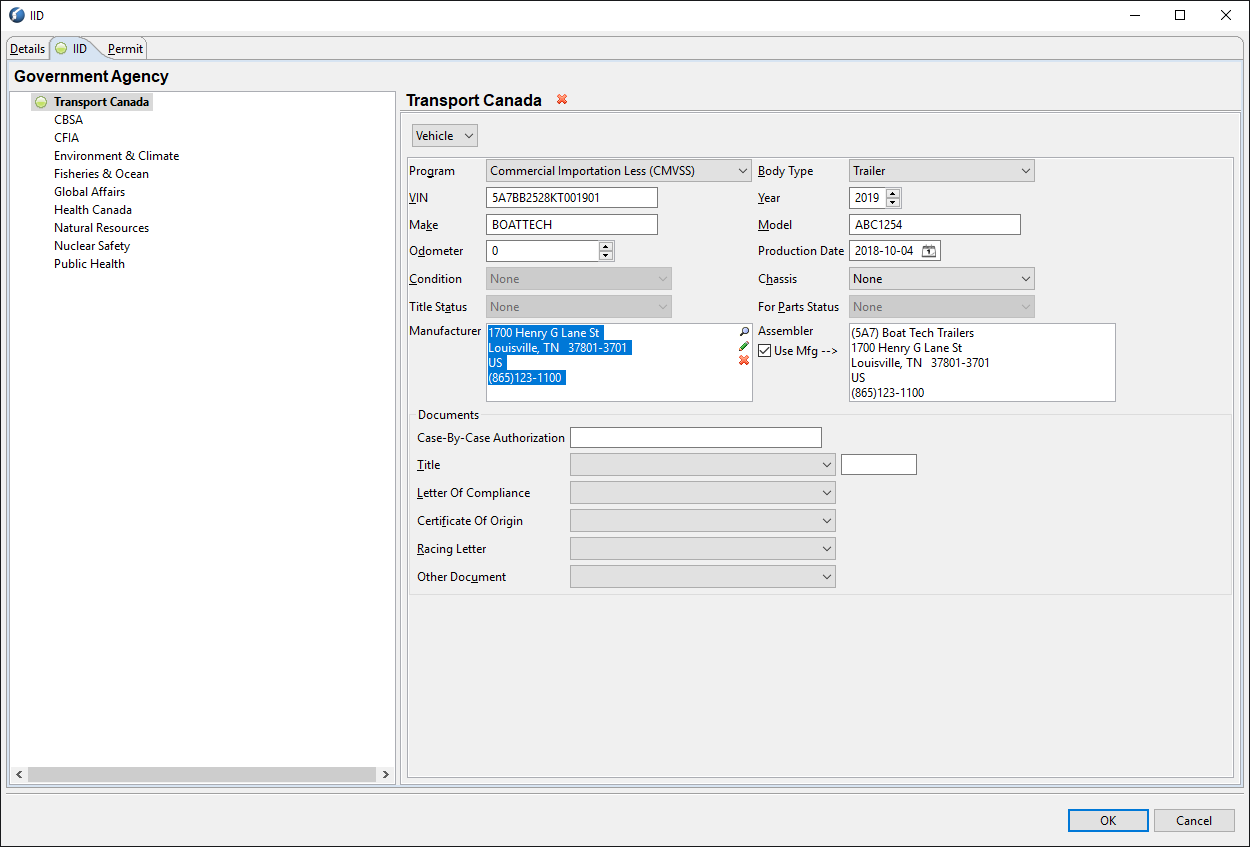
Enter the Details for “Transport Canada”. Please ensure that you Enter the correct VIN Number so that the fields: Make, Manufacturer and Year automatically populate or load.
Step 8:
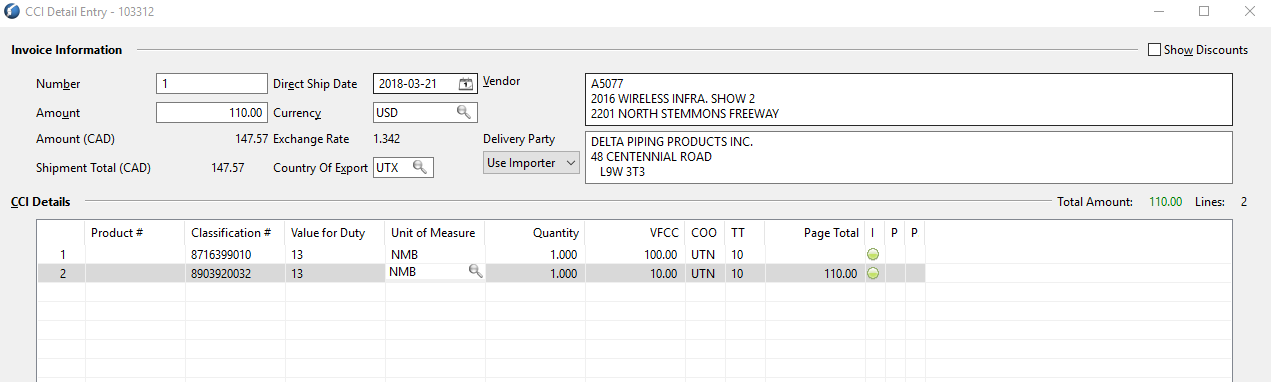
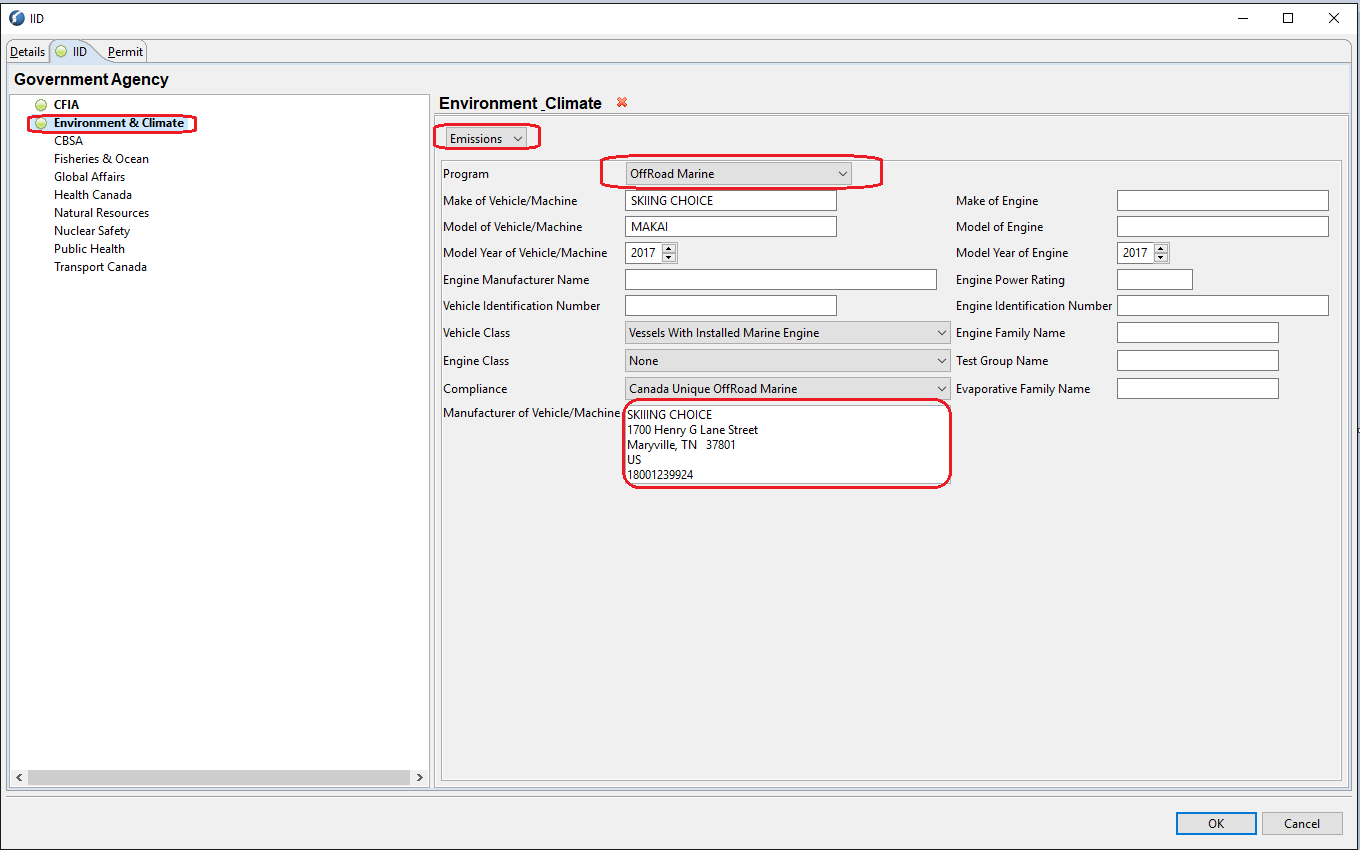
Select the 2nd line on the CCI Detail Entry screen and click on "Details" to fill out the IID Details for the respective PGAs
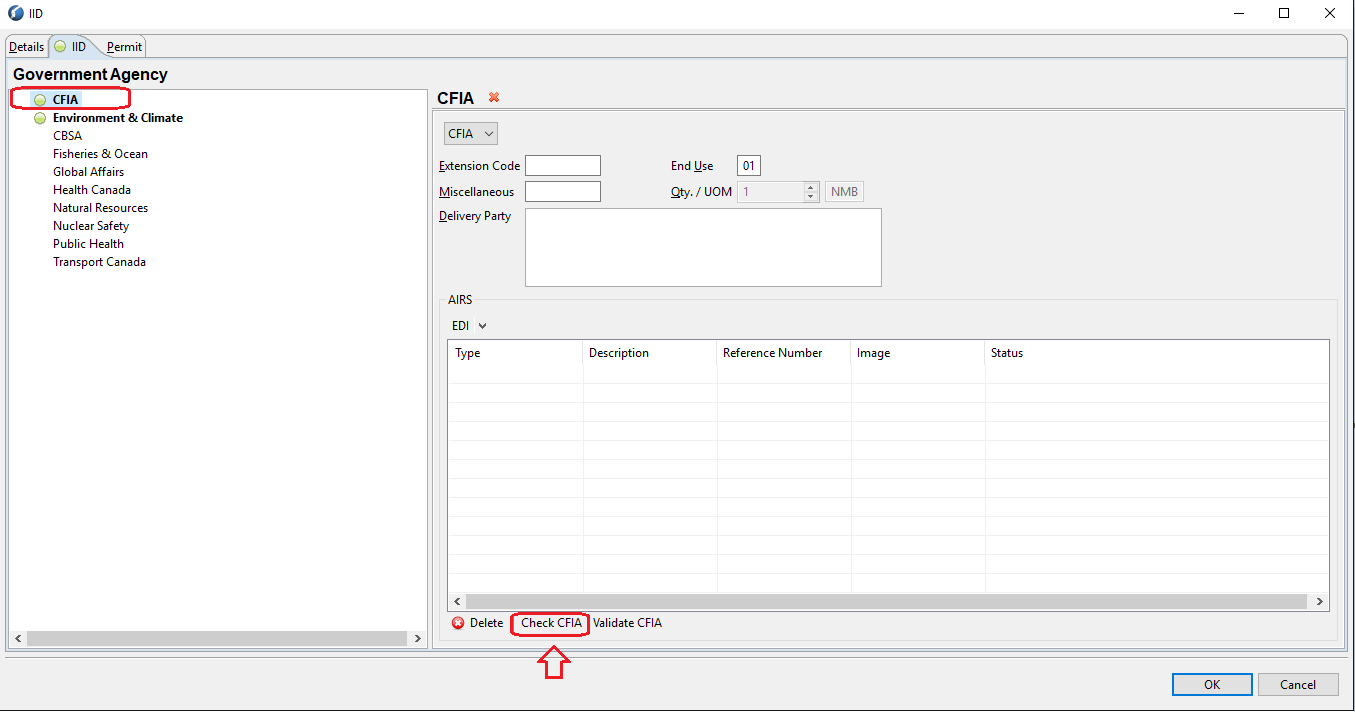
Fill out the CFIA Details by using the 'Check CFIA' wizard as per below
Step 9:
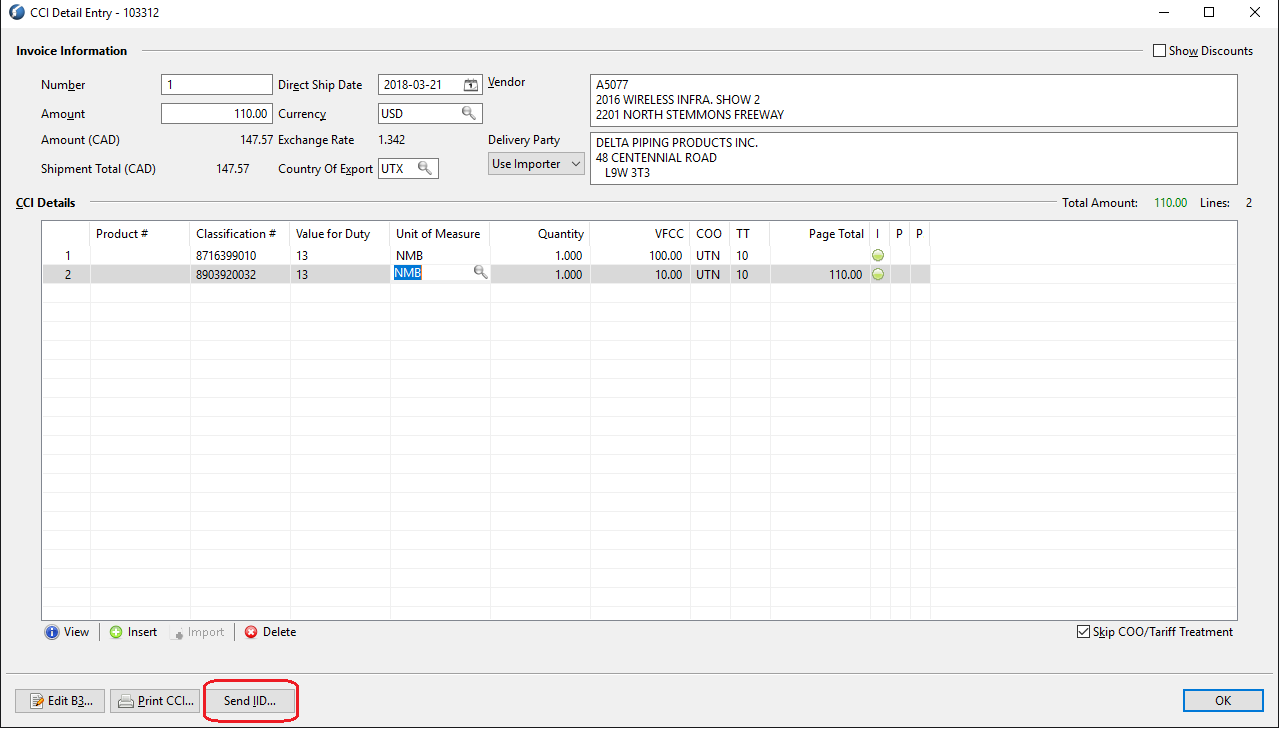
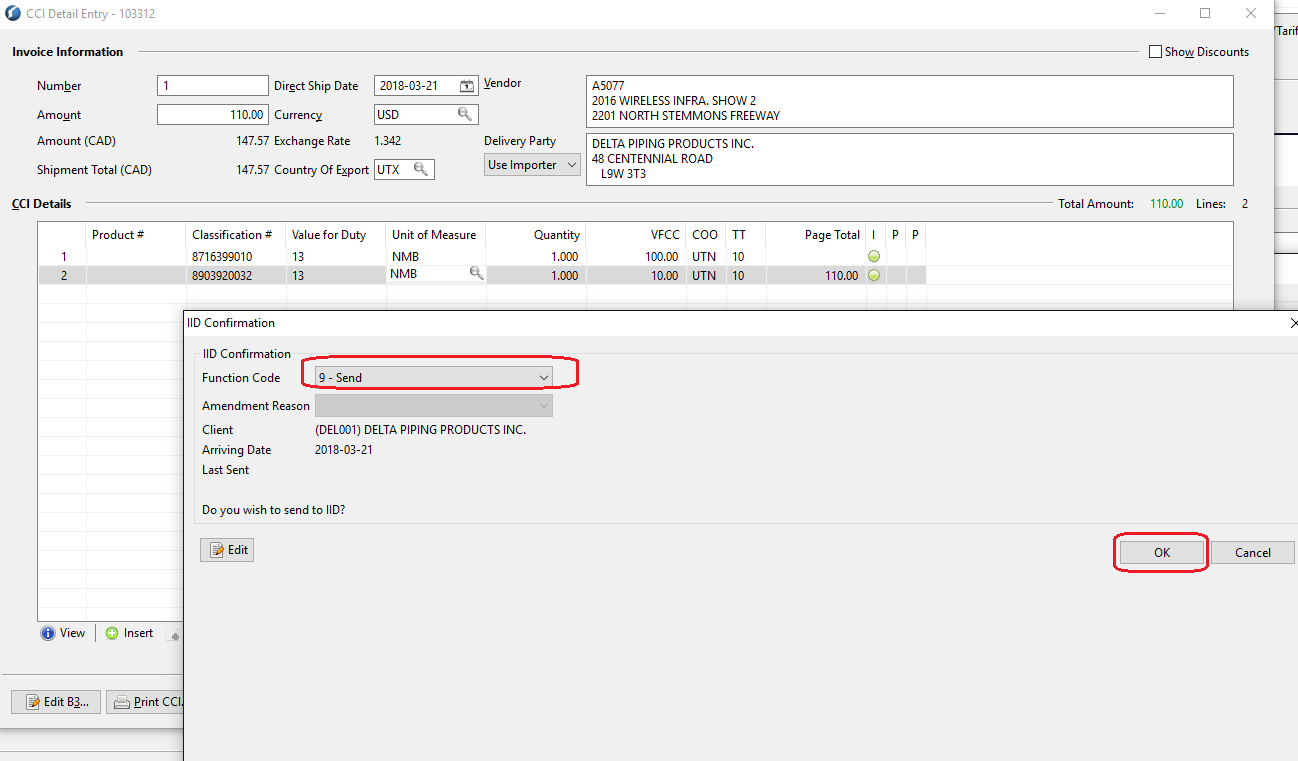
Send Shipment to IID/ACROSS: Please click on “Send IID” on the CCI Detail Entry screen.
Comments
0 comments
Article is closed for comments.