Meat Shipments

Step 1:
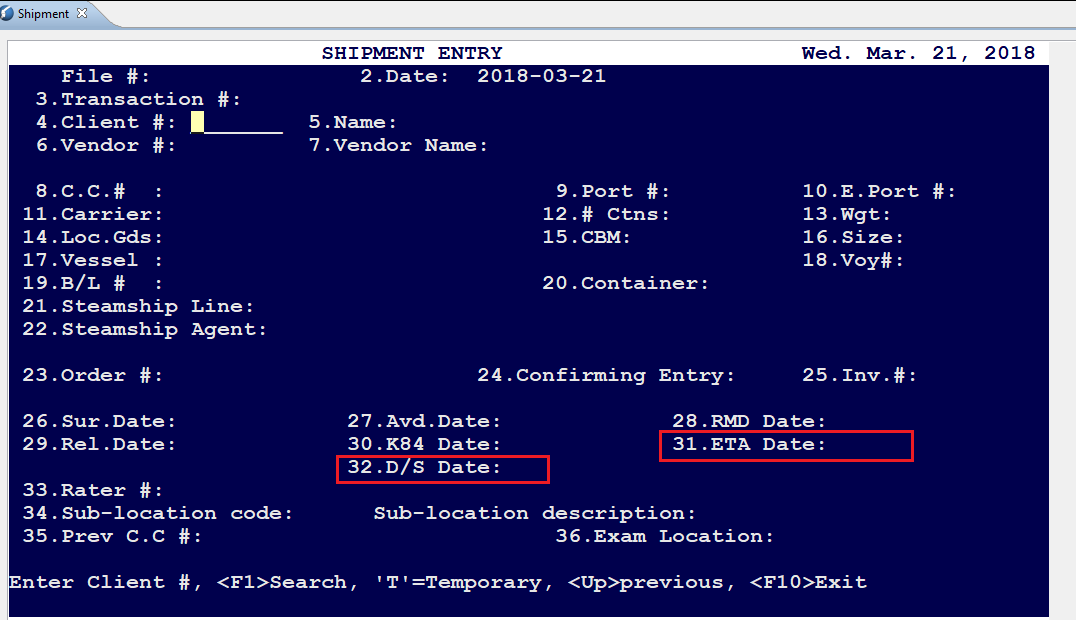
Go into the Shipment Entry screen (13-1) and start keying in your shipment data as usual. Ensure that the ETA Date/Field # 31 is completed as now mandatory.
Step 2:
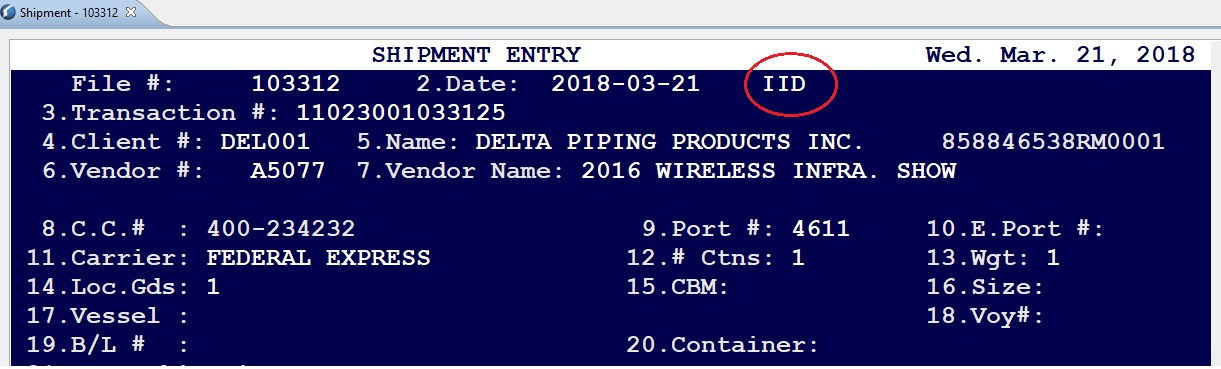
After the transaction # is generated with the File #; “File Number XXXX has been created, with the Transaction Number XXXXXXXXXX”, Press the “F9” key to ENABLE IID and you should see “IID” on the top of the Shipment entry screen. See screenshot below:
Step 3:
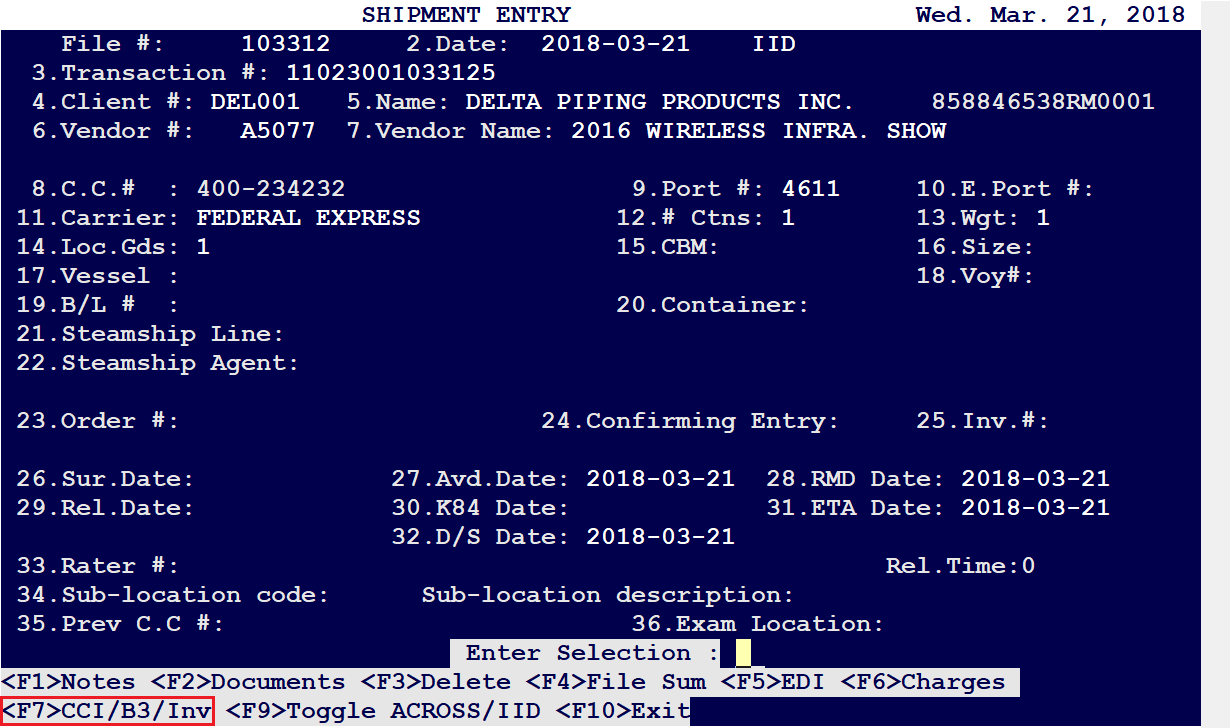
Once “IID” appears on the top, press on “F7” to select CCI and then ENTER as usual.
Step 4:
Field # 8, Press on <F5> to edit the client. Ensure the correct City, Province, Country and “Contact” with Email Address” are entered properly.
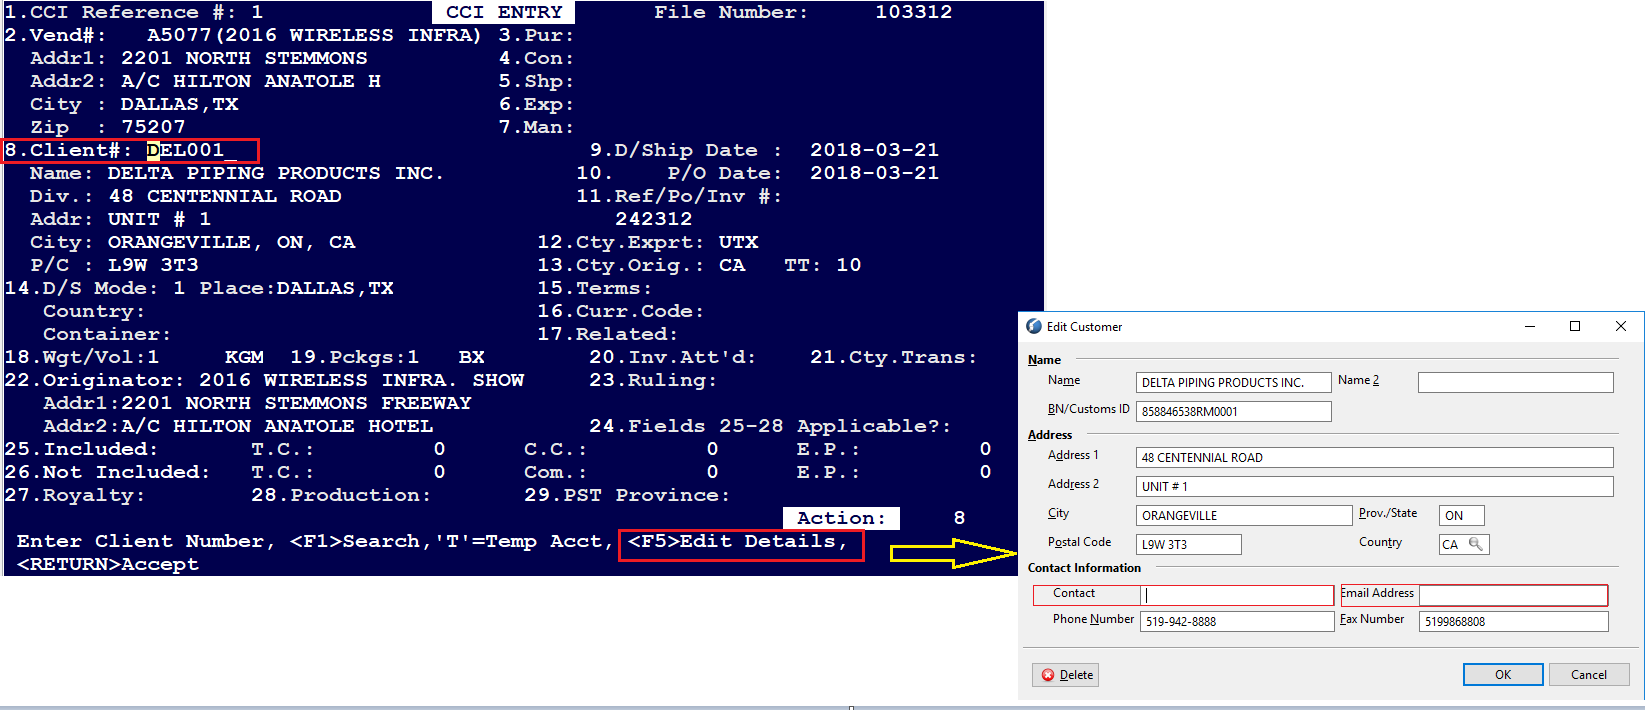
Step 5:
Continue to key in the CCI Details, and ensure that the UOM is selected for Field # 18 and Field # 19 (Field 19 is currently BX Boxes)
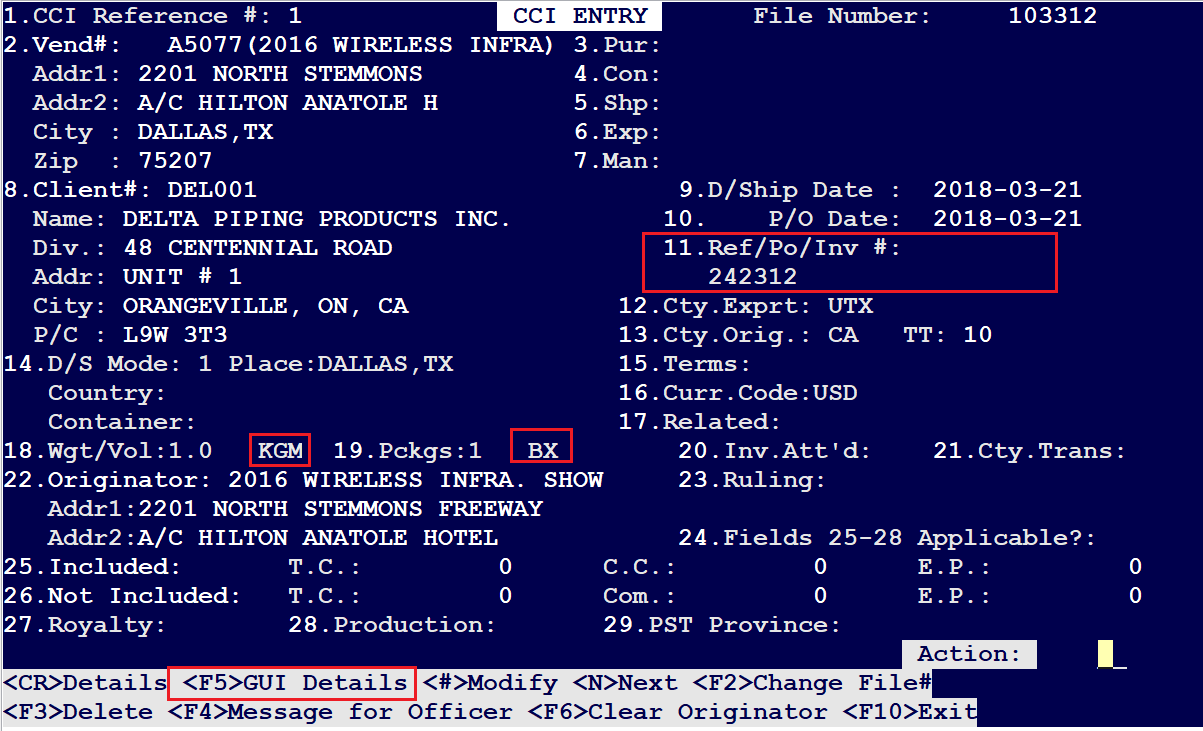
Step 6:
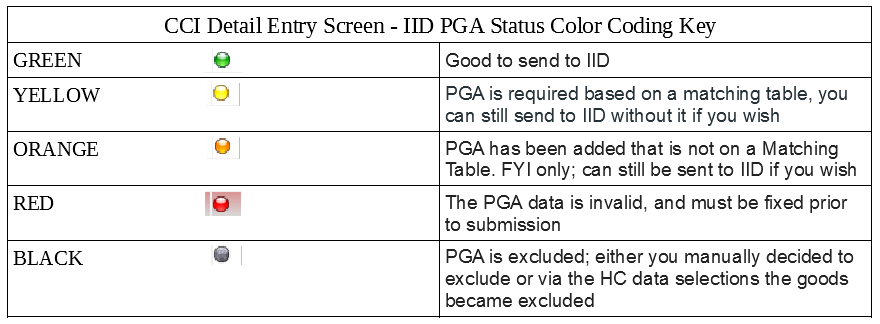
<F5> GUI Details to enter Invoice data. Enter Total Shipment Value. Also please refer to the IID PGA Viewing Modes and Status below:
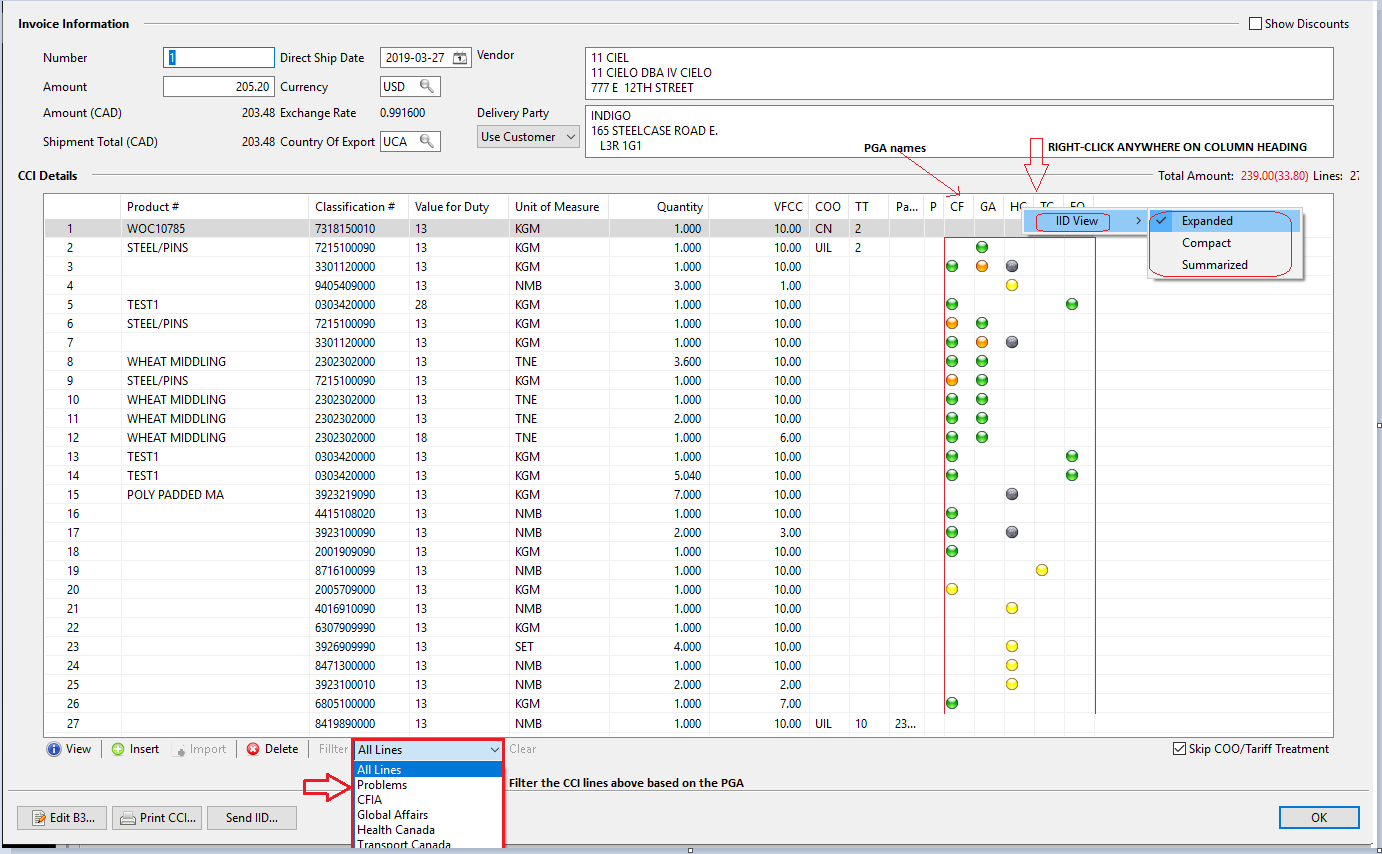
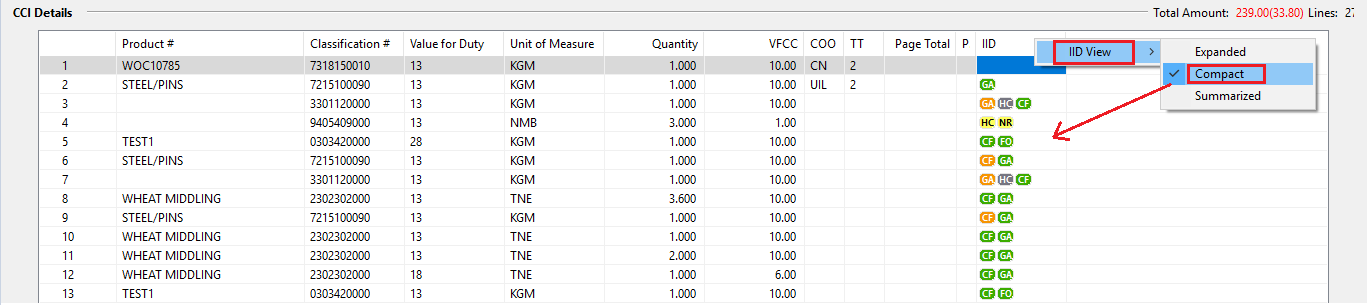
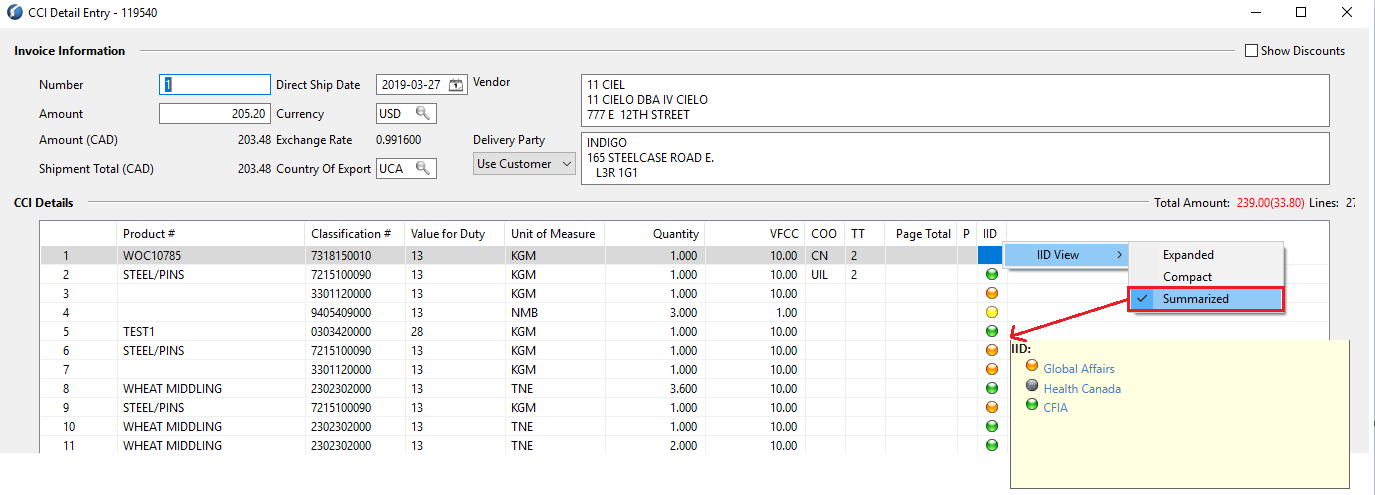
- Please note you can also use the "Import" option in the above window to import CCIs from a spreadsheet, instead of a manual line by line entry. How to use the 'Import' option - the guide is over here: Import CCI option
- Also the "Unit of Measure" value above can be changed as required
Step 7:
Fill out the CFIA details carefully selecting the right category/classification for your meat product. The lines for which a pull-down menu appears, click on that and select “Manage” which is where the actual LICENSING documents are to be imported and initially sent to Customs for their approval
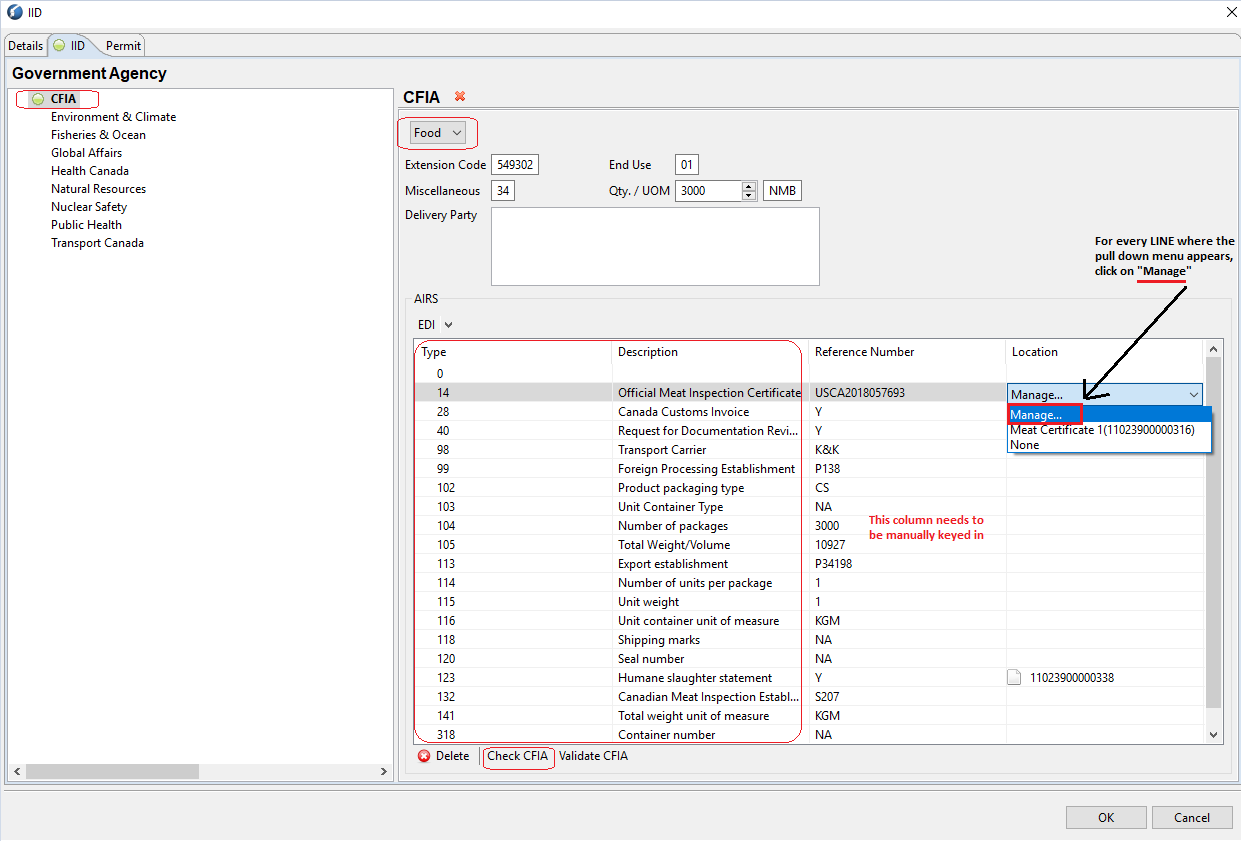
Step 8:
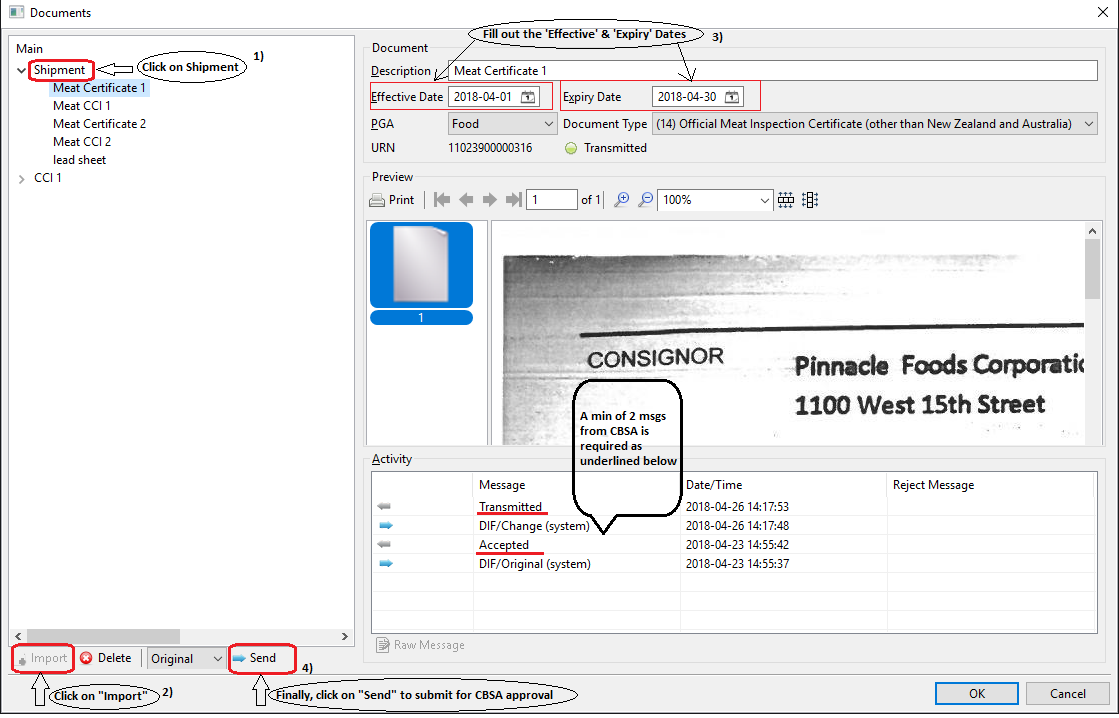
Once ‘Manage’ is clicked, the documents window is launched.
- Click on “Shipment” ensuring it is selected
- Then click on “Import” to import your licensing documents
- Fill out the “Effective Date” and “Expiry” Date
- Then finally click on “Send” to send those documents to Customs for an initial approval
Step 9:
Once the above license is approved by CBSA, you will see on the CFIA window – pull down menu for that Line, the license appears to be selected.
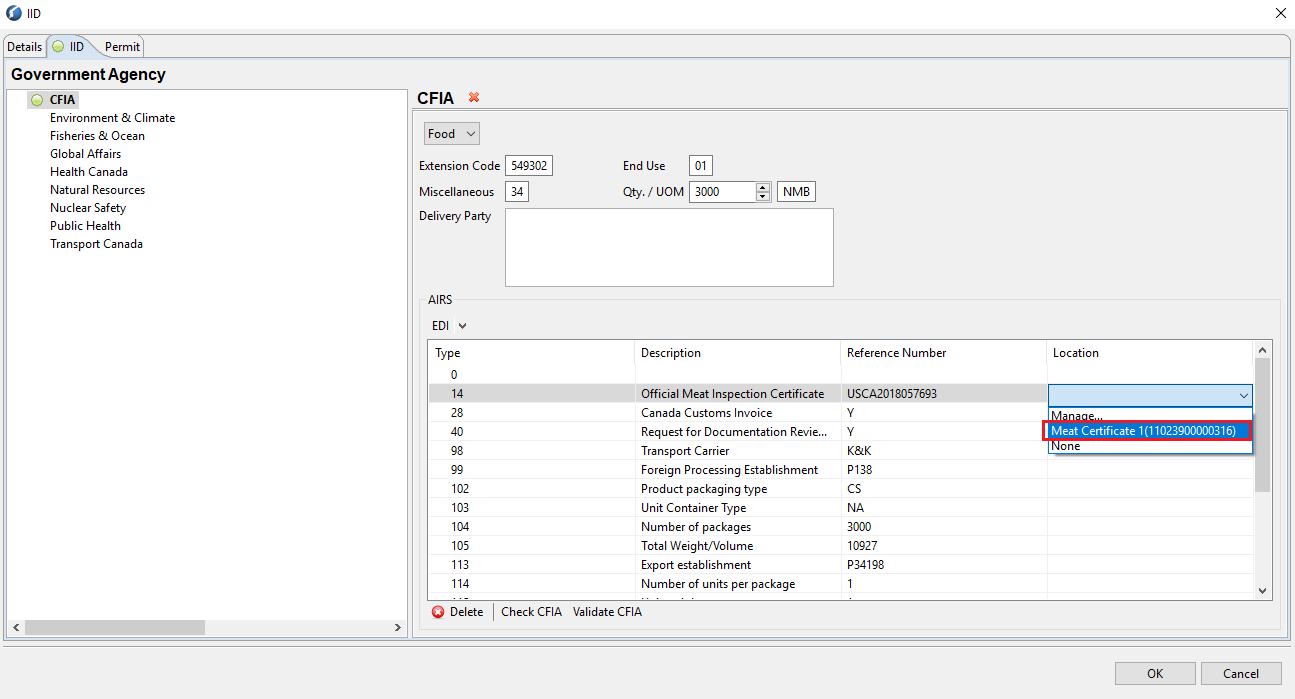
Step 10:
Continue the same with the rest of the CFIA lines where the Pull-Down menu appears, get it accepted by CBSA like in Step # 8, and once ‘Accepted’, go to the CFIA window and select that license from the pull down menu like Step # 9
Step 11:
Fill out the Global Affairs PGA
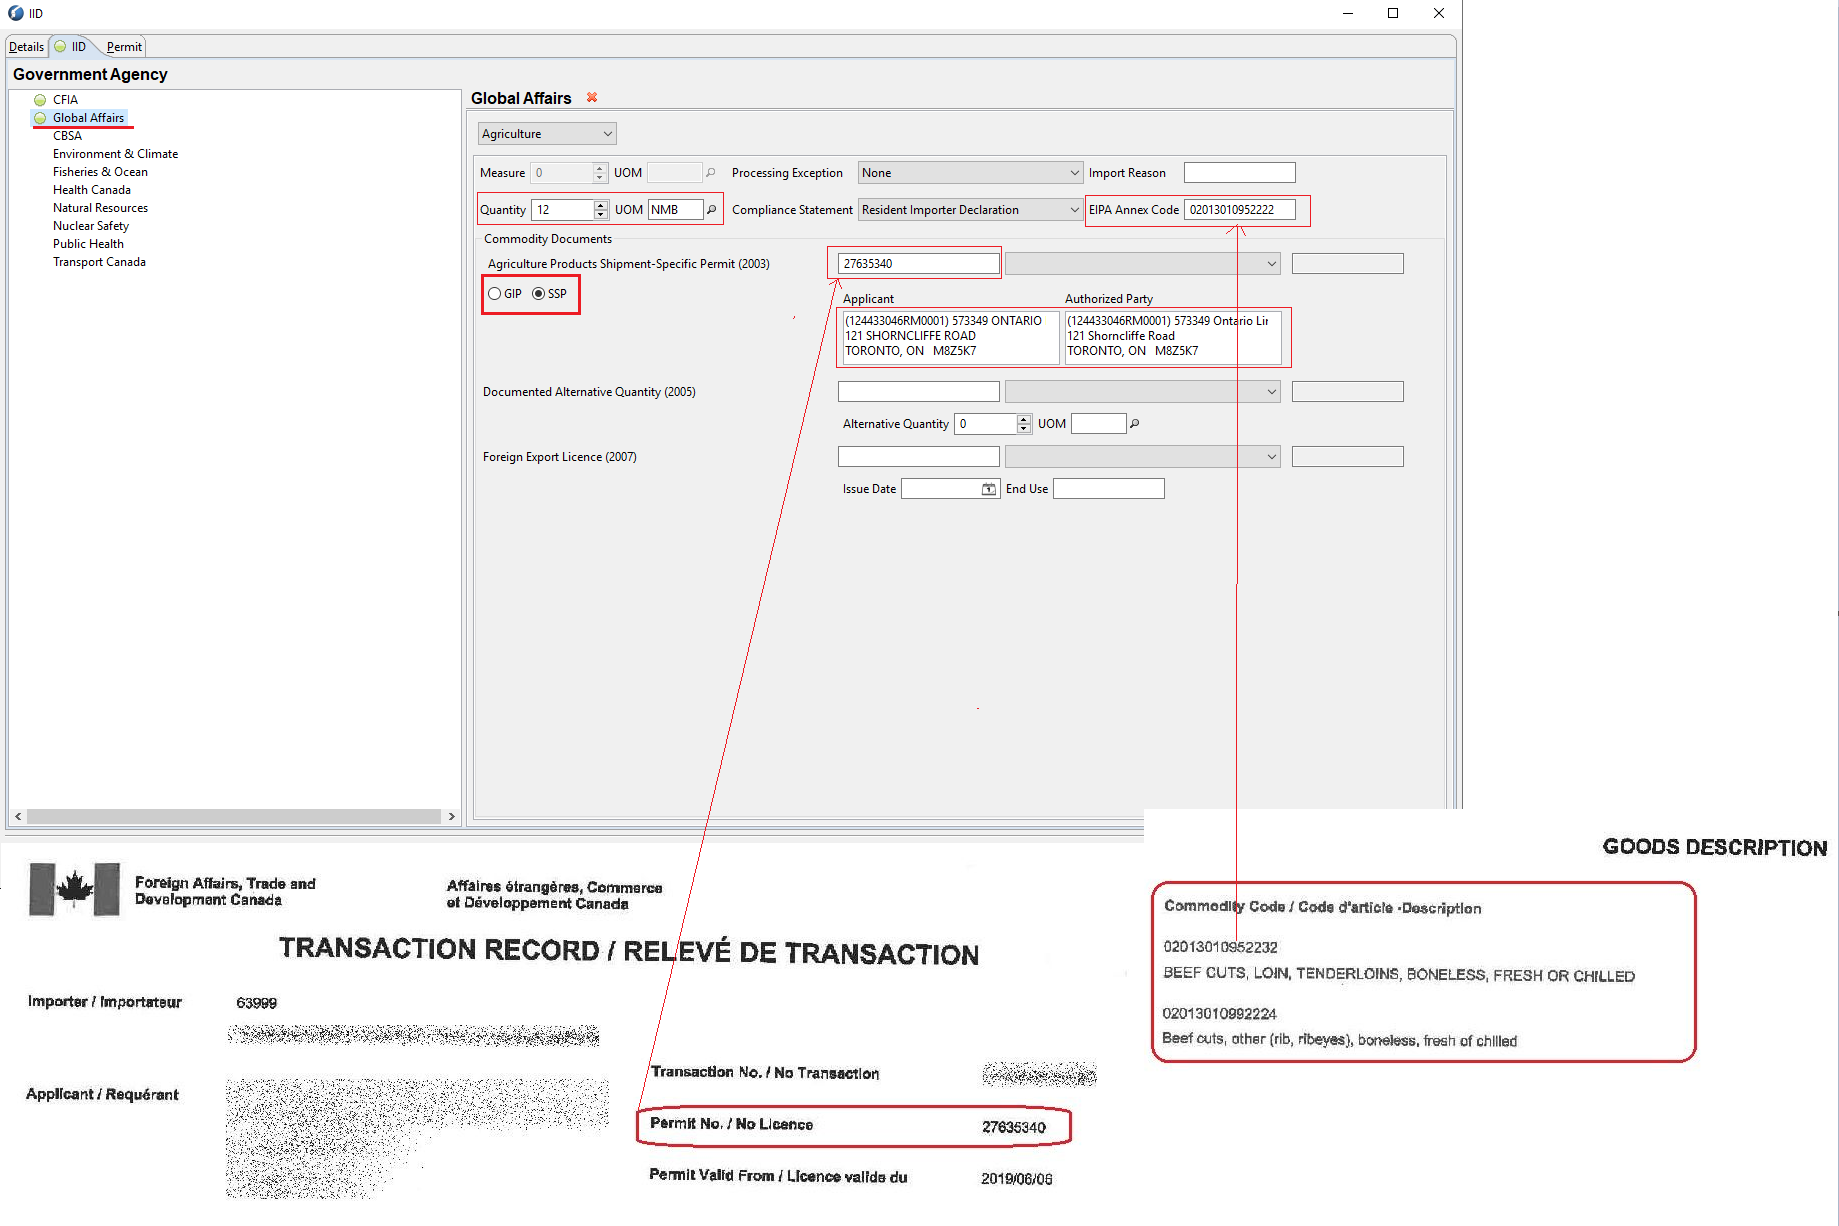
Step 12:
On some shipments, CBSA requires the Customs Broker and Account Owner information to be provided by the Broker. It can be accessed by pressing on F5 on the Shipment Entry screen. See below.
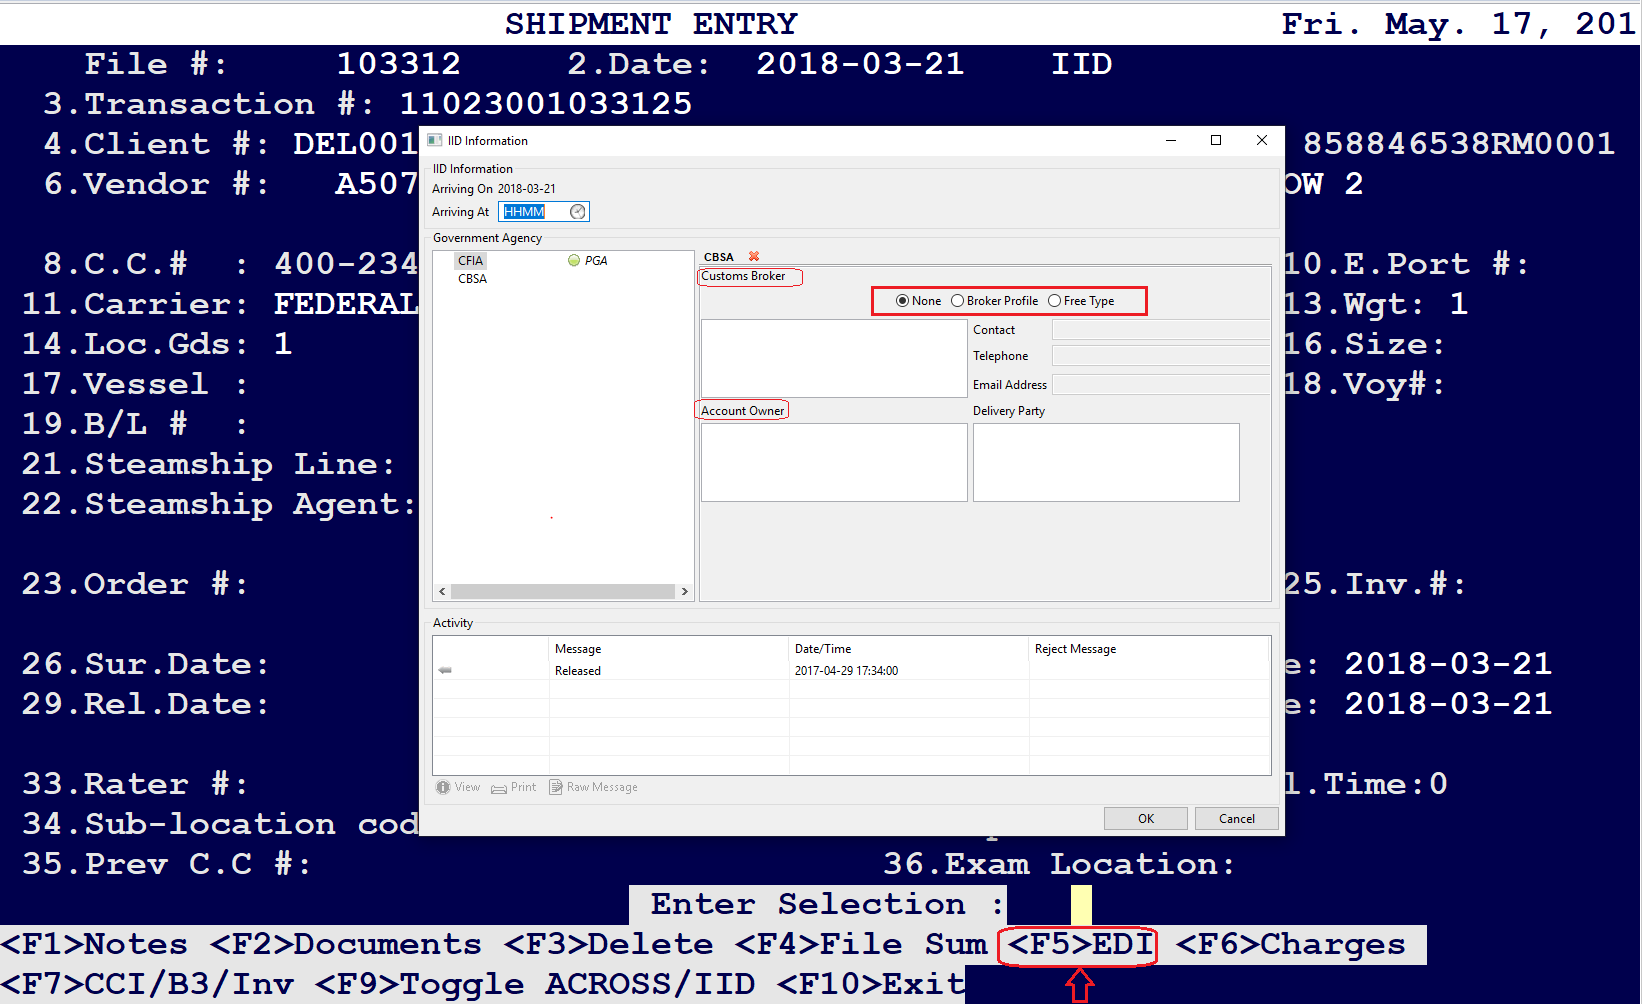
Step 13:
Once the CFIA licensing & importing is approved by CBSA, click on “OK” to close the CFIA window and on the CCI Detail Entry screen, click on “Send IID” to send it to CBSA.
Comments
0 comments
Article is closed for comments.