B2 Entry Creation

Before you key in a B2, ensure that the B2 Control File is configured and setup by Candata
- B2 Control File can be found under Main Menu: 20 - (1) B2 Control File
- Other Items that need setting up are at Main Menu: 20 - (2) Cheque Mailing File, (4) Explanation File and (6) Customs Act File
- B2 entry can be created. Go to Main Menu: 20 – 10 (B2 Entry)
Step 1:
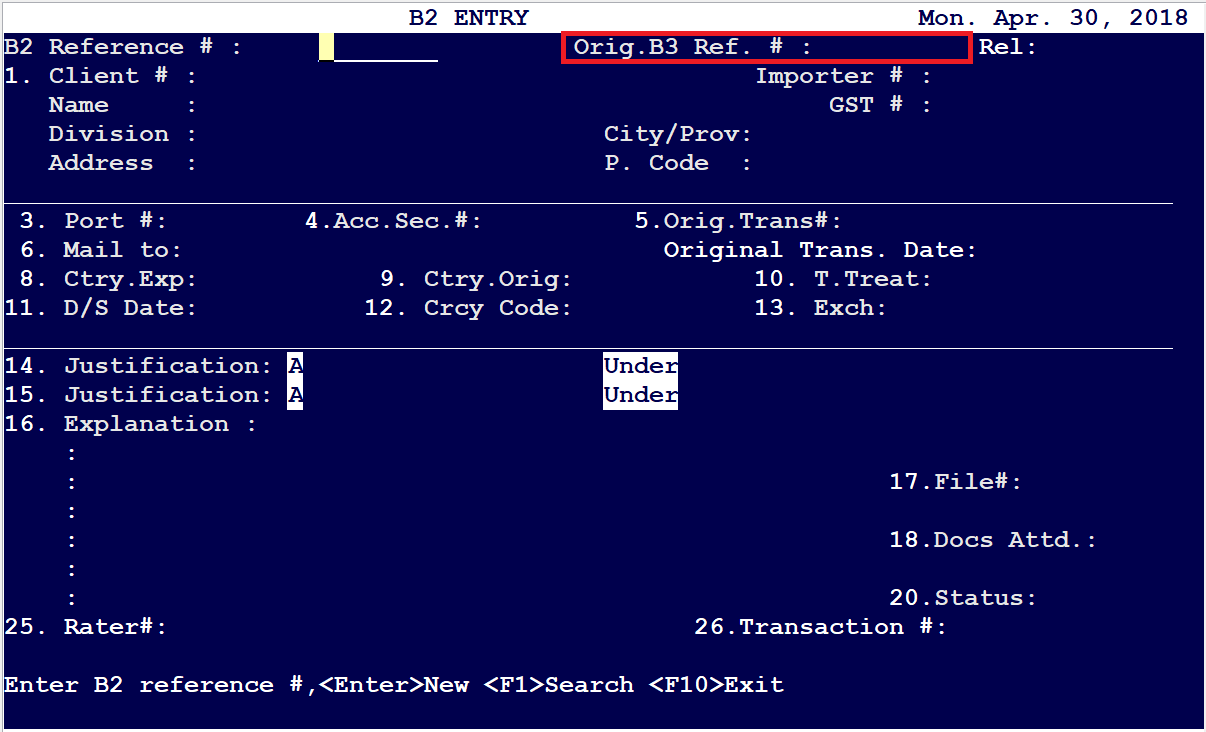
Enter the ‘Original B3 Ref #’ / File Number.
- The original entry details will automatically populate the first two sections (fields 1-13). Fields 14, 15 and 16 are completed based on the required B2 data and/or the default profiles as mentioned above.
- After field 26, the system will generate the B2 reference (File) number (used for tracing and retrieval) and the Transaction number. See snapshot below
Enter will bring you to the B2 Entry Details
Step 2:
Fields 14, 15 and 16 are completed based on the required B2 data and/or the default profiles as mentioned above. Press ENTER on Field # 26 which will generate a Transaction # and a File #. See below:
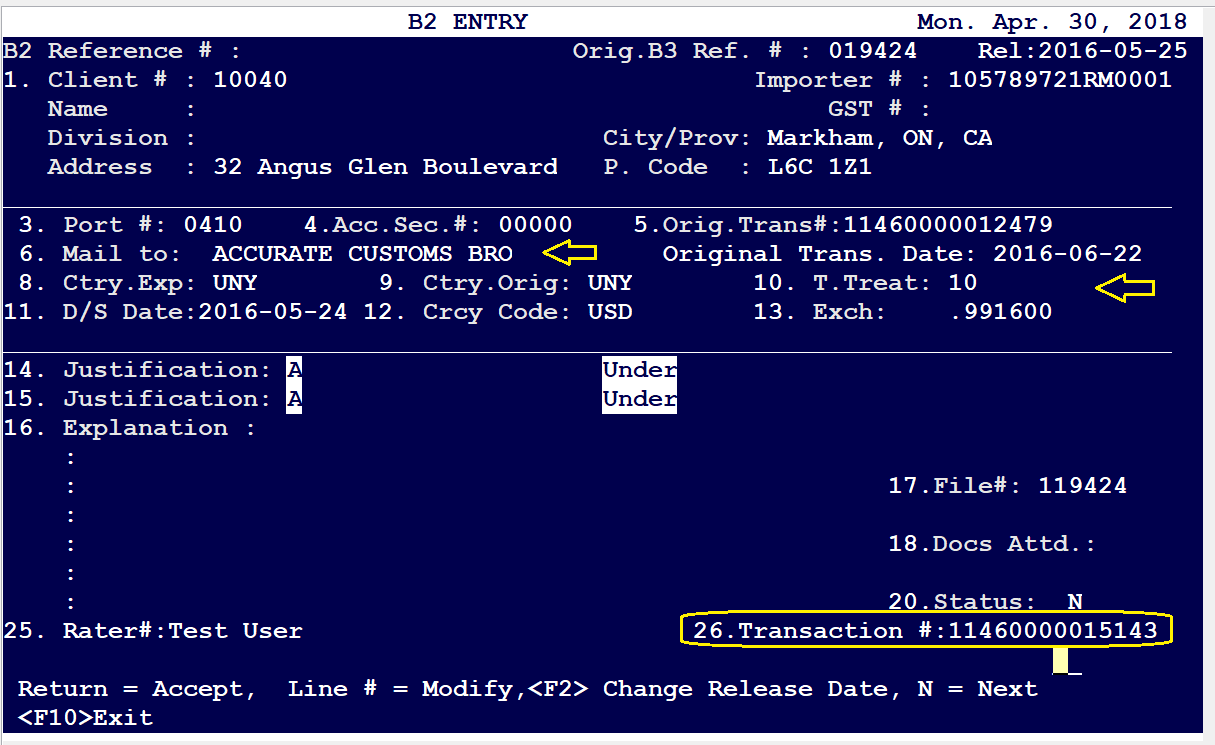
Step 3:
On the next screen, enter “1” to load the First B3 Line data which was accounted for.
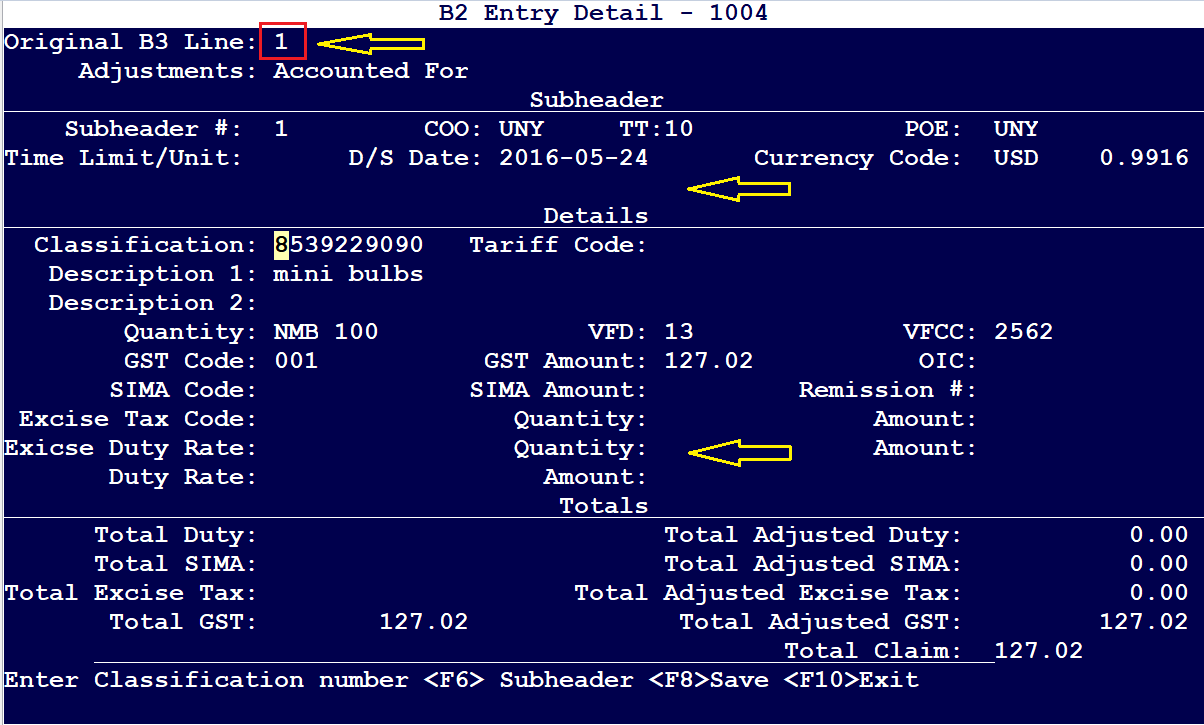
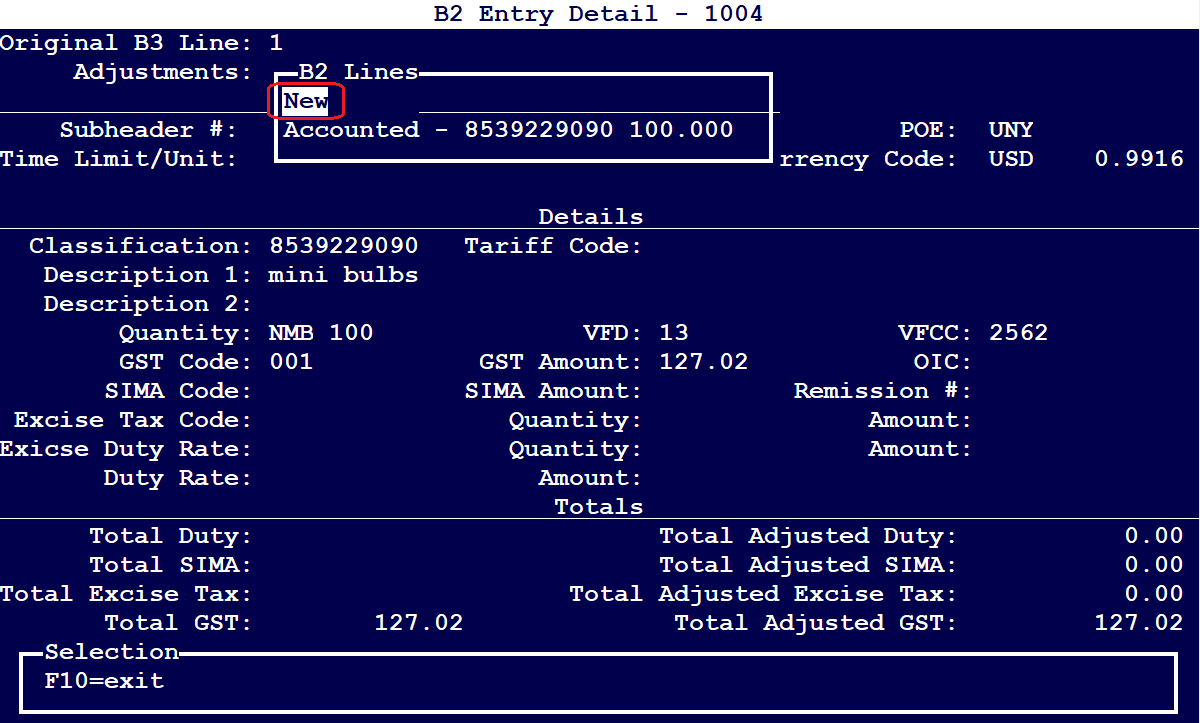
And if you want to change anything in the “Accounted” B3 & Lines, press on ‘F8’ and select “NEW”
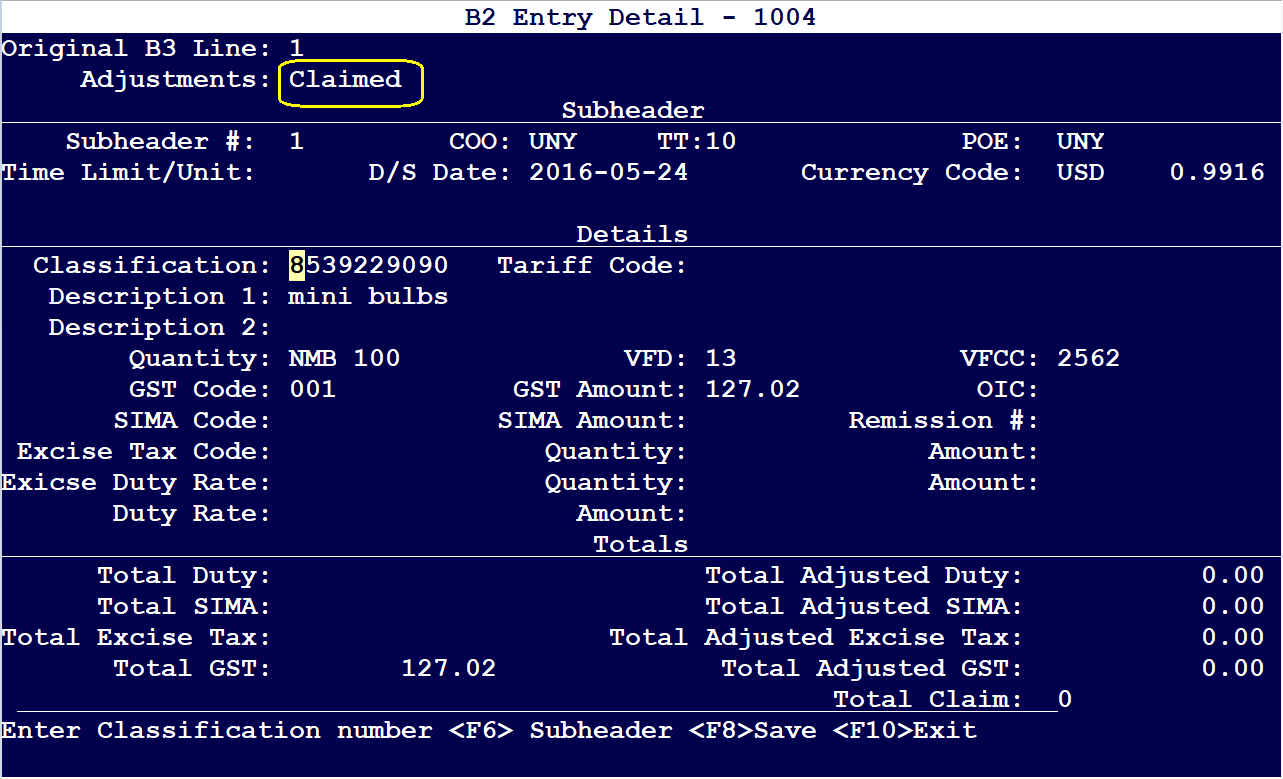
Step 4:
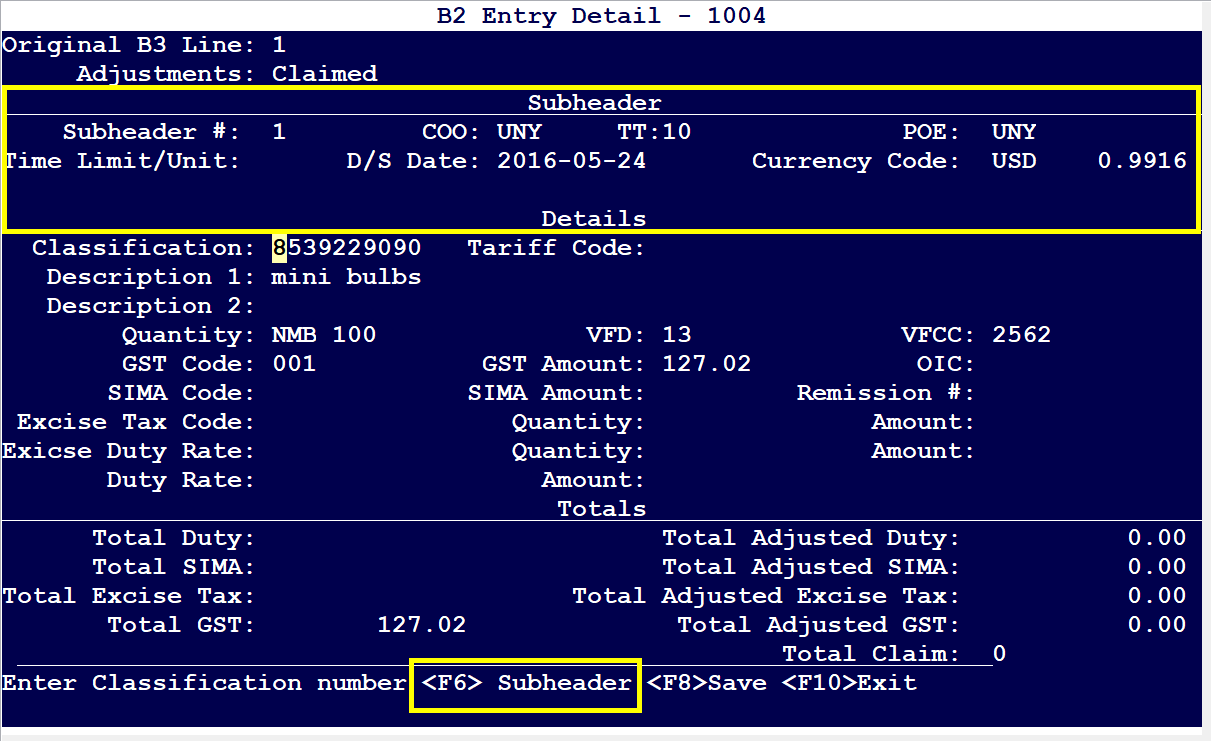
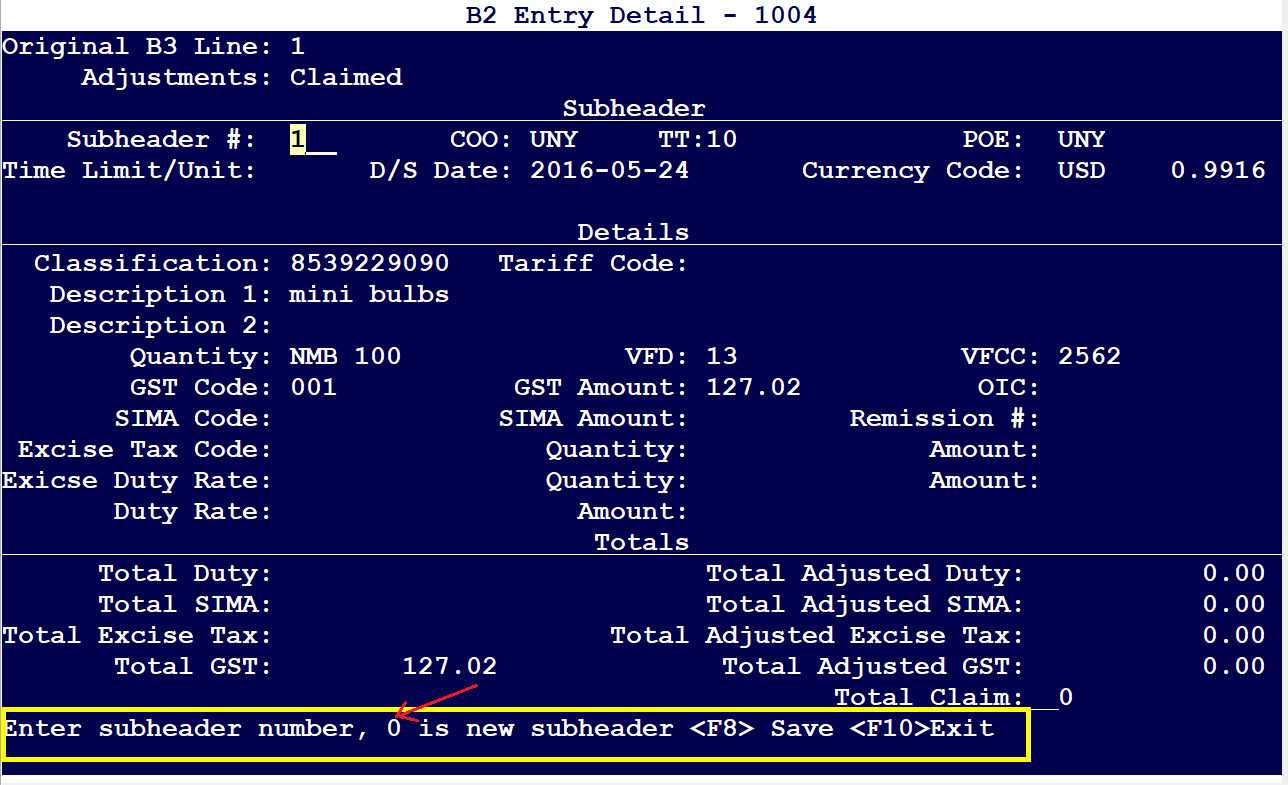
If Subheader needs to be modified/changed, please press on “F6”. New subheader is 0. F8 Save
You can create multiple “New-As Claimed/Split” lines by selecting New again and repeating as above.
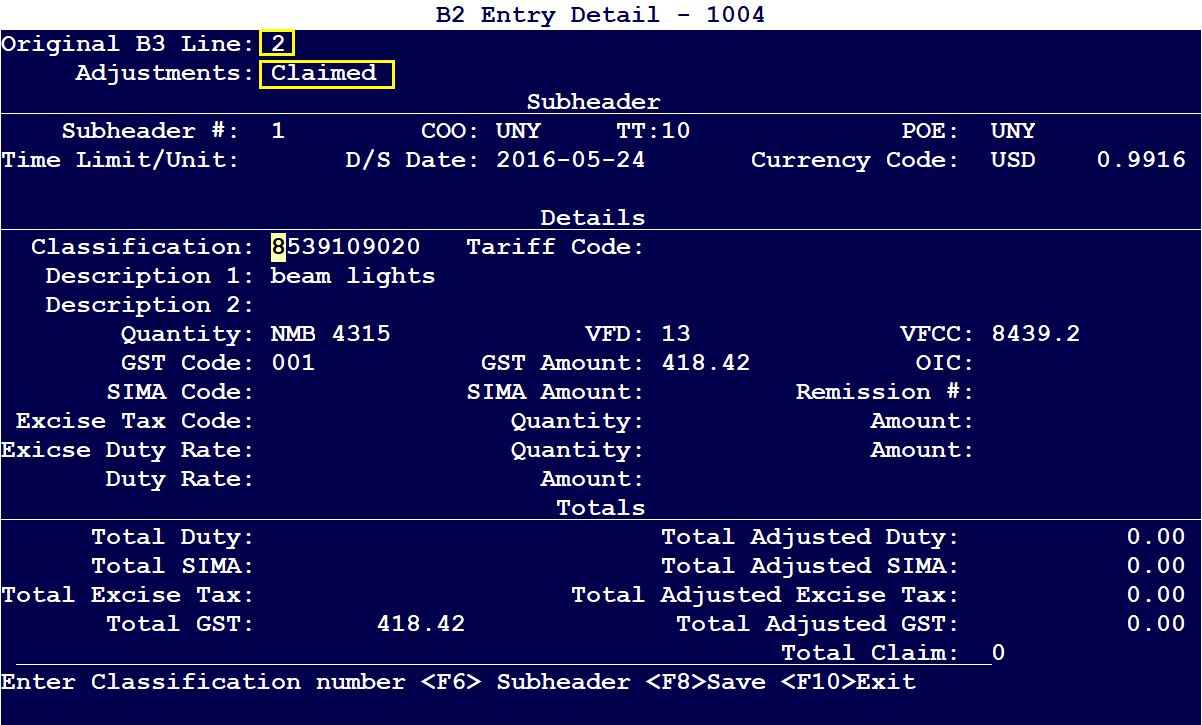
And if B3 Line 2 needs to be modified, you type “2” and press ENTER to load the ‘Accounted’ for option.
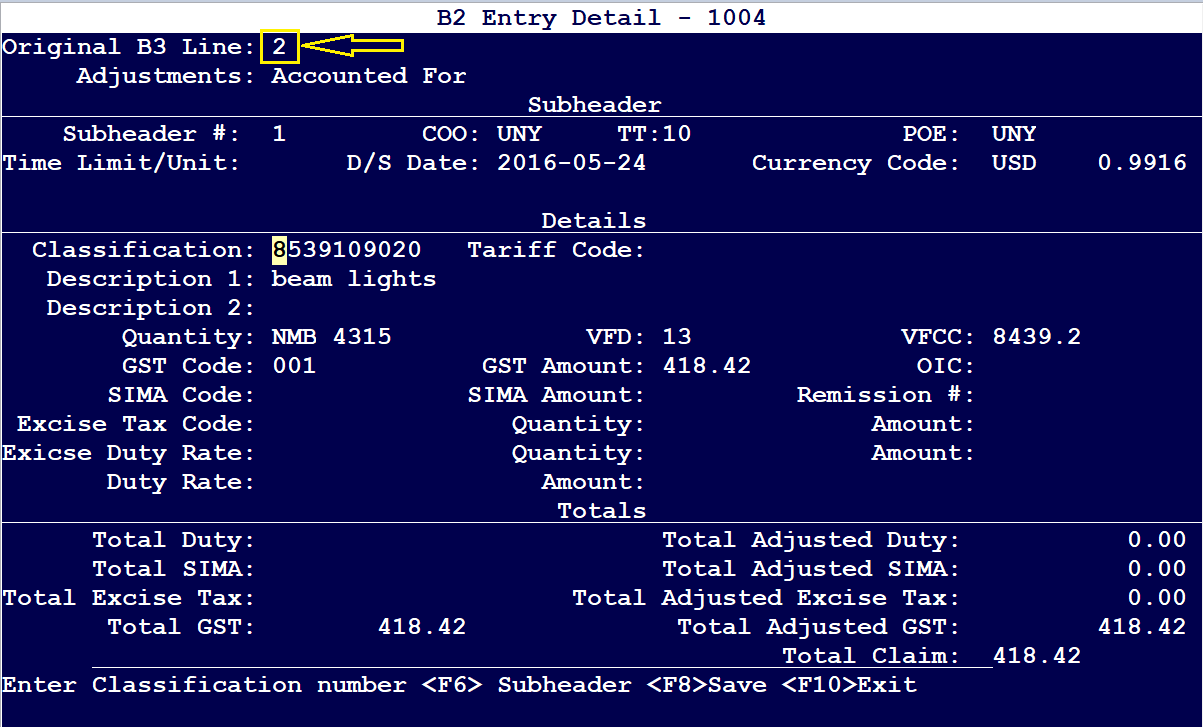
If the Accounted For B3 Line 2 needs to be corrected/modified, press on “F8” and select “New” to load the Claimed Line. F9 to Print the B2.
Comments
0 comments
Article is closed for comments.